引言
在日常的开发中,除了使用 Spring Boot 这个企业级快速构建项目的框架之外,随着业务数据量的大幅度增加,对元数据库造成的压力成倍剧增。在此背景下,
引言
在日常的开发中,除了使用 Spring Boot 这个企业级快速构建项目的框架之外,随着业务数据量的大幅度增加,对元数据库造成的压力成倍剧增。在此背景下, Redis 这个 NoSQL 数据库已然整个项目架构中的不可或缺的一部分,懂得如何 Spring Boot 整合 Redis ,是当今开发人员必备的一项技能,接下来对整合步骤进行详细说明。
一、环境准备
在开始开发之前,我们需要准备一些环境配置:
- jdk 1.8 或其他更高版本
- 开发工具 IDEA
- 管理依赖 Maven
- Redis环境,推荐linux系统中搭建redis环境
二、构建Spring Boot项目
打开 idea -> file -> Nwe -> Project ,如图,勾选填写相关的配置信息:
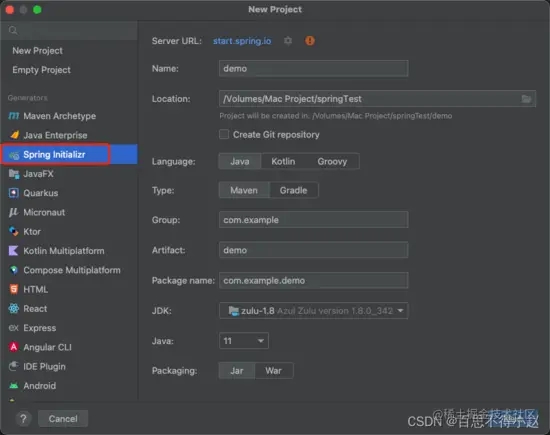
勾选一些初始化的依赖配置:

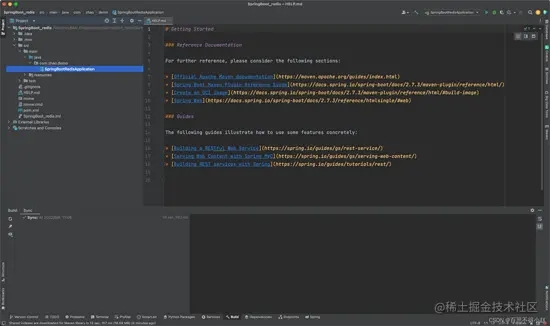
Spring Boot项目初始化完成。
三、引入Redis依赖
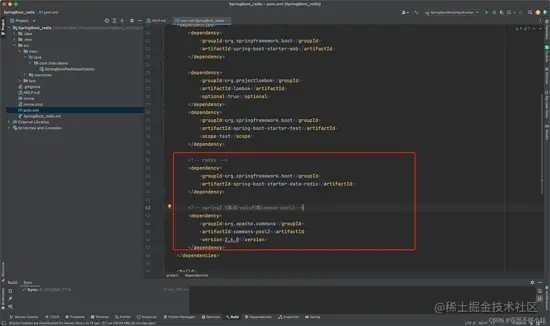
构建完成Spring Boot项目工程之后,需要在 pom.xml 文件中引入 redis 相关依赖
<!-- redis -->
<dependency>
	<groupId>org.springframework.boot</groupId>
	<artifactId>spring-boot-starter-data-redis</artifactId>
</dependency>
<!-- spring2.X集成redis所需common-pool2-->
<dependency>
	<groupId>org.apache.commons</groupId>
	<artifactId>commons-pool2</artifactId>
	<version>2.6.0</version>
</dependency>
四、Reds相关配置
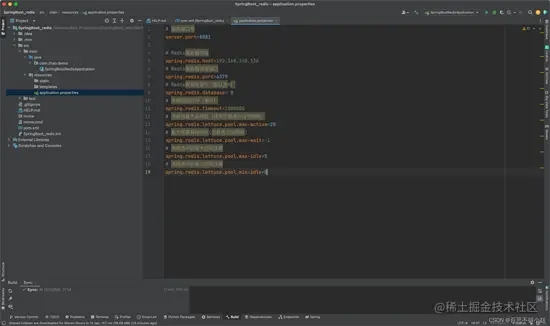
将redis相关的依赖引入到项目中之后,需要对redis进行一些配置,在 application.properties配置redis:
# Redis服务器地址
spring.redis.host=自己搭建的redis服务器的 IP
# Redis服务器连接端口
spring.redis.port=6379
# Redis数据库索引(默认为0)
spring.redis.database= 0
# 连接超时时间(毫秒)
spring.redis.timeout=1800000
# 连接池最大连接数(使用负值表示没有限制)
spring.redis.lettuce.pool.max-active=20
# 最大阻塞等待时间(负数表示没限制)
spring.redis.lettuce.pool.max-wait=-1
# 连接池中的最大空闲连接
spring.redis.lettuce.pool.max-idle=5
# 连接池中的最小空闲连接
spring.redis.lettuce.pool.min-idle=0
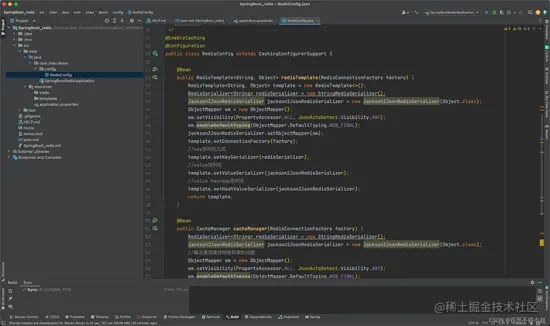
五、添加Redis配置类
对Redis相关配置完成后,添加Redis配置类,(拿来即用):
package com.zhao.demo.config;
import com.fasterxml.jackson.annotation.JsonAutoDetect;
import com.fasterxml.jackson.annotation.PropertyAccessor;
import com.fasterxml.jackson.databind.ObjectMapper;
import org.springframework.cache.CacheManager;
import org.springframework.cache.annotation.CachingConfigurerSupport;
import org.springframework.cache.annotation.EnableCaching;
import org.springframework.context.annotation.Bean;
import org.springframework.context.annotation.Configuration;
import org.springframework.data.redis.cache.RedisCacheConfiguration;
import org.springframework.data.redis.cache.RedisCacheManager;
import org.springframework.data.redis.connection.RedisConnectionFactory;
import org.springframework.data.redis.core.RedisTemplate;
import org.springframework.data.redis.serializer.Jackson2JsonRedisSerializer;
import org.springframework.data.redis.serializer.RedisSerializationContext;
import org.springframework.data.redis.serializer.RedisSerializer;
import org.springframework.data.redis.serializer.StringRedisSerializer;
import java.time.Duration;
/**
 * @author xiaoZhao
 * @date 2022/9/6
 * @describe
 */
@EnableCaching
@Configuration
public class RedisConfig extends CachingConfigurerSupport {
    @Bean
    public RedisTemplate<String, Object> redisTemplate(RedisConnectionFactory factory) {
        RedisTemplate<String, Object> template = new RedisTemplate<>();
        RedisSerializer<String> redisSerializer = new StringRedisSerializer();
        Jackson2JsonRedisSerializer jackson2JsonRedisSerializer = new Jackson2JsonRedisSerializer(Object.class);
        ObjectMapper om = new ObjectMapper();
        om.setVisibility(PropertyAccessor.ALL, JsonAutoDetect.Visibility.ANY);
        om.enableDefaultTyping(ObjectMapper.DefaultTyping.NON_FINAL);
        jackson2JsonRedisSerializer.setObjectMapper(om);
        template.setConnectionFactory(factory);
        //key序列化方式
        template.setKeySerializer(redisSerializer);
        //value序列化
        template.setValueSerializer(jackson2JsonRedisSerializer);
        //value hashmap序列化
        template.setHashValueSerializer(jackson2JsonRedisSerializer);
        return template;
    }
    @Bean
    public CacheManager cacheManager(RedisConnectionFactory factory) {
        RedisSerializer<String> redisSerializer = new StringRedisSerializer();
        Jackson2JsonRedisSerializer jackson2JsonRedisSerializer = new Jackson2JsonRedisSerializer(Object.class);
        //解决查询缓存转换异常的问题
        ObjectMapper om = new ObjectMapper();
        om.setVisibility(PropertyAccessor.ALL, JsonAutoDetect.Visibility.ANY);
        om.enableDefaultTyping(ObjectMapper.DefaultTyping.NON_FINAL);
        jackson2JsonRedisSerializer.setObjectMapper(om);
        // 配置序列化(解决乱码的问题),过期时间600秒
        RedisCacheConfiguration config = RedisCacheConfiguration.defaultCacheConfig()
                .entryTtl(Duration.ofSeconds(600))
                .serializeKeysWith(RedisSerializationContext.SerializationPair.fromSerializer(redisSerializer))
                .serializeValuesWith(RedisSerializationContext.SerializationPair.fromSerializer(jackson2JsonRedisSerializer))
                .disableCachingNullValues();
        RedisCacheManager cacheManager = RedisCacheManager.builder(factory)
                .cacheDefaults(config)
                .build();
        return cacheManager;
    }
}
六、测试一下
将所有的环境依赖和配置搭建完成之后,进行测试一把。
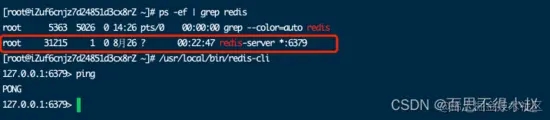
① 首先,确保安装 Redis 的服务器已经启动Redis服务
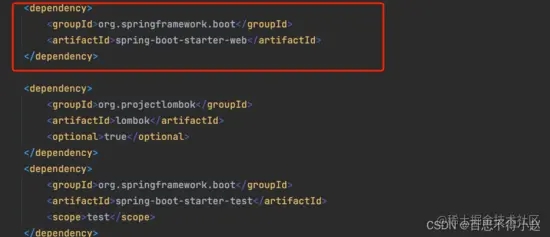
② 编写 controller 类,前提需要引入 Spring Boot Web 的依赖:
package com.zhao.demo.controller;
import org.springframework.beans.factory.annotation.Autowired;
import org.springframework.data.redis.core.RedisTemplate;
import org.springframework.web.bind.annotation.GetMapping;
import org.springframework.web.bind.annotation.RequestMapping;
import org.springframework.web.bind.annotation.RestController;
/**
 * @author xiaoZhao
 * @date 2022/9/6
 * @describe
 */
@RestController
@RequestMapping("/redistest")
public class RedisTestController {
    @Autowired
    private RedisTemplate redisTemplate;
    @GetMapping
    public String testRedis(){
        // 设置值到reids
        redisTemplate.opsForValue().set("name","jack");
        // 从redis中获取值
        String name = (String)redisTemplate.opsForValue().get("name");
        return name;
    }
}
③ 启动Spring Boot工程,在浏览器上向接口发送请求:
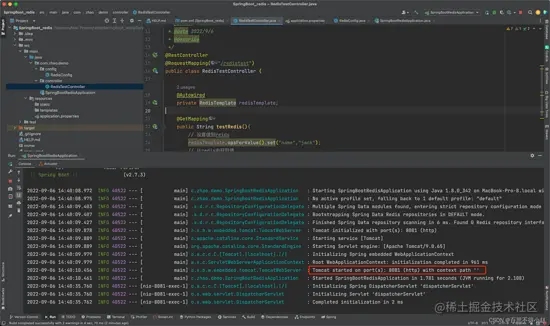
项目启动成功,向 /redistest 接口发送请求
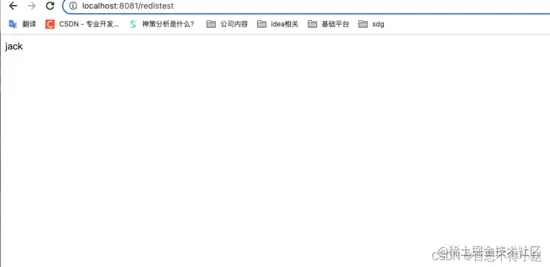
请求发送成功,获取到数据,测试成功,至此Spring Boot整合 Redis所有步骤已经完成,更多关于SpringBoot整合NoSQL Redis的资料请关注好代码网其它相关文章!