| 软件 | 下载地址 |
|---|---|
| CentOS-7-x86_64-Minimal-2009.iso | http://mirrors.163.com/centos/7.9.2009/isos/x86_64/CentOS-7-x86_64-Minimal-2009.iso |
| oracle-database-preinstall-19c-1.0-1.el7.x86_64.rpm | https://www.aliyundrive.com/s/F9ziMB6nPbp |
| oracle-database-ee-19c-1.0-1.x86_64.rpm | https://www.aliyundrive.com/s/E6m5e8CCGq2 |
一. 环境配置
虚拟机安装建议分2G内存,30G硬盘。
关闭防火墙(或放行相关端口)
systemctl stop firewalld
systemctl disable firewalld
关闭selinux
修改SELINUX=disabled
vi /etc/selinux/config
# This file controls the state of SELinux on the system. # SELINUX= can take one of these three values: # enforcing - SELinux security policy is enforced. # permissive - SELinux prints warnings instead of enforcing. # disabled - No SELinux policy is loaded. SELINUX=disabled # SELINUXTYPE= can take one of three values: # targeted - Targeted processes are protected, # minimum - Modification of targeted policy. Only selected processes are protected. # mls - Multi Level Security protection. SELINUXTYPE=targeted
重启
reboot
将oracle-database-ee-19c-1.0-1.x86_64.rpm和oracle-database-preinstall-19c-1.0-1.el7.x86_64.rpm上传到/opt下
二. 依赖安装
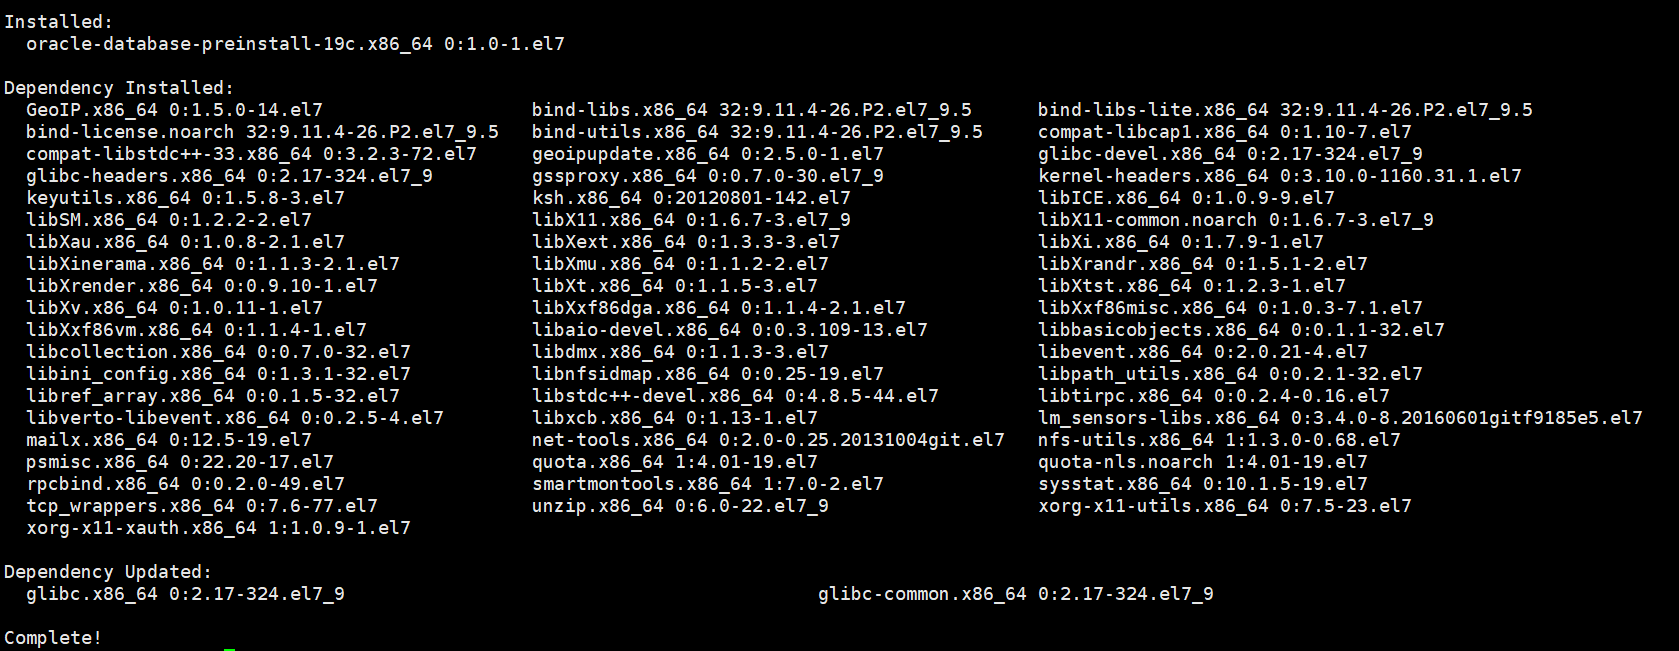
安装oracle-database-preinstall-19c-1.0-1.el7.x86_64.rpm
yum -y localinstall /opt/oracle-database-preinstall-19c-1.0-1.el7.x86_64.rpm
三. 安装配置Oracle 19c
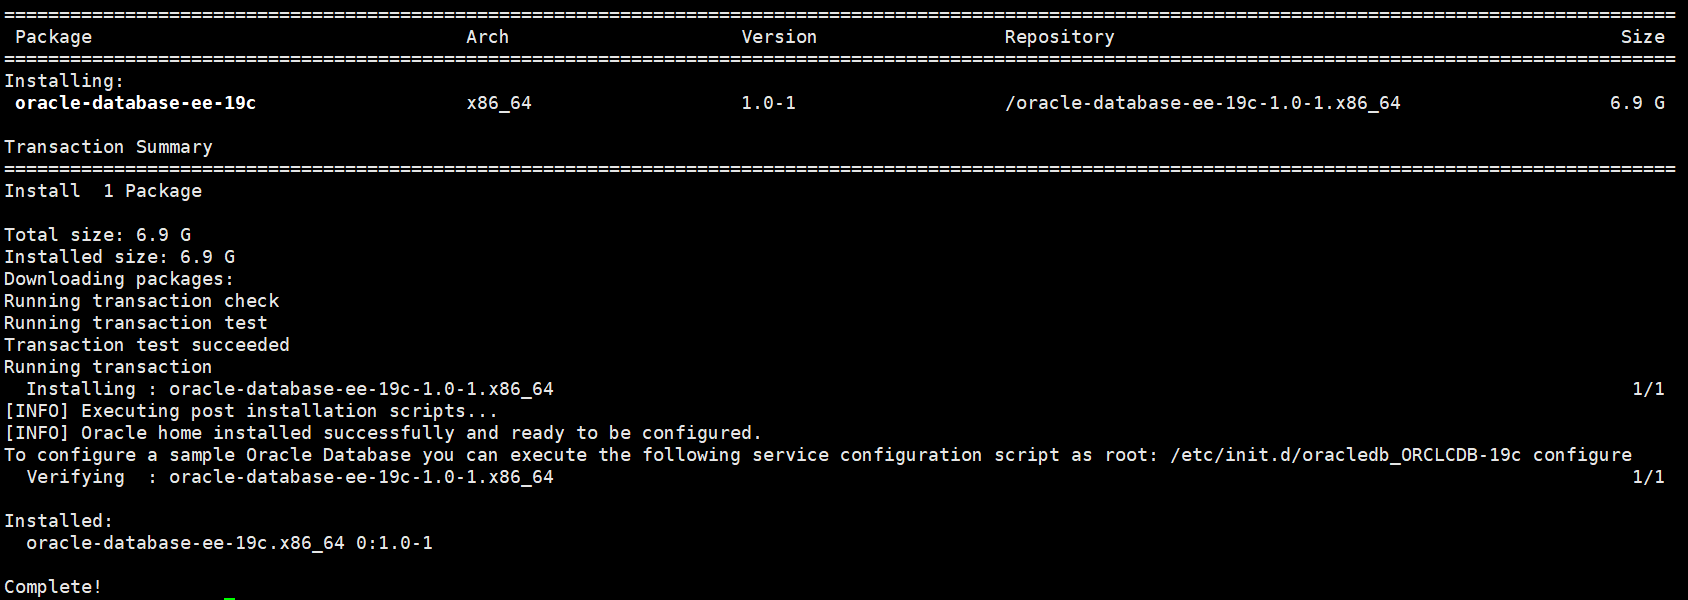
安装Oracle 19c
yum -y localinstall /opt/oracle-database-ee-19c-1.0-1.x86_64.rpm
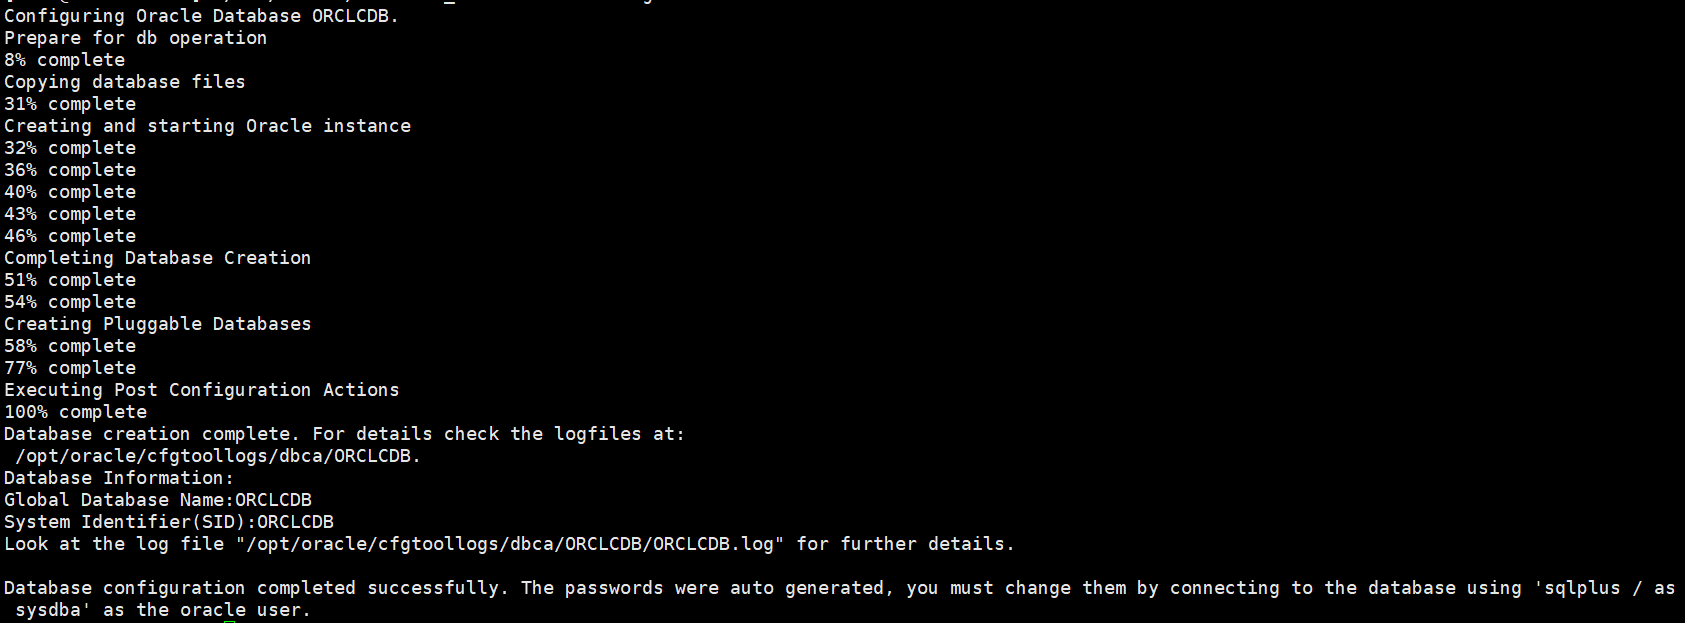
初始化Oracle数据库(时间较长)
/etc/init.d/oracledb_ORCLCDB-19c configure
配置环境变量
却换到oracle用户
su - oracle
添加环境变量
vi /home/oracle/.bash_profile
# .bash_profile

# Get the aliases and functions
if [ -f ~/.bashrc ]; then
        . ~/.bashrc
fi

# User specific environment and startup programs

PATH=$PATH:$HOME/.local/bin:$HOME/bin

export PATH

export ORACLE_HOME=/opt/oracle/product/19c/dbhome_1
export PATH=$PATH:/opt/oracle/product/19c/dbhome_1/bin
export ORACLE_SID=ORCLCDB
使环境变量生效
source /home/oracle/.bash_profile
登陆数据库
sqlplus / as sysdba

修改system密码为123456
alter user system identified by 123456;
退出数据库
exit;
四. 设置数据库监听自启动
修改/etc/oratab文件N为Y
vi /etc/oratab
# This file is used by ORACLE utilities. It is created by root.sh # and updated by either Database Configuration Assistant while creating # a database or ASM Configuration Assistant while creating ASM instance.
# A colon, ':', is used as the field terminator. A new line terminates # the entry. Lines beginning with a pound sign, '#', are comments. # # Entries are of the form: # $ORACLE_SID:$ORACLE_HOME:<N|Y>: # # The first and second fields are the system identifier and home # directory of the database respectively. The third field indicates # to the dbstart utility that the database should , "Y", or should not, # "N", be brought up at system boot time. # # Multiple entries with the same $ORACLE_SID are not allowed. # # ORCLCDB:/opt/oracle/product/19c/dbhome_1:Y
在/etc/rc.local中添加需执行的命令
su root # 却换为root用户 vi /etc/rc.local
#!/bin/bash
# THIS FILE IS ADDED FOR COMPATIBILITY PURPOSES
#
# It is highly advisable to create own systemd services or udev rules
# to run scripts during boot instead of using this file.
#
# In contrast to previous versions due to parallel execution during boot
# this script will NOT be run after all other services.
#
# Please note that you must run 'chmod +x /etc/rc.d/rc.local' to ensure
# that this script will be executed during boot.

touch /var/lock/subsys/local

su - oracle -c 'lsnrctl start'
su - oracle -c 'dbstart'
修改$ORACLE_HOME/bin/dbstart文件,修改ORACLE_HOME_LISTNER=$ORACLE_HOME
vi $ORACLE_HOME/bin/dbstart
$ORACLE_HOME/bin/dbstart 文件局部
...
#####################################

LOGMSG="logger -puser.alert -s "

trap 'exit' 1 2 3

# for script tracing
case $ORACLE_TRACE in
  T) set -x ;;
esac

# Set path if path not set (if called from /etc/rc)
SAVE_PATH=/bin:/usr/bin:/etc:${PATH} ; export PATH
SAVE_LLP=$LD_LIBRARY_PATH

# First argument is used to bring up Oracle Net Listener
ORACLE_HOME_LISTNER=$ORACLE_HOME
if [ ! $ORACLE_HOME_LISTNER ]; then
  echo "Since ORACLE_HOME is not set, cannot auto-start Oracle Net Listener."
  echo "Usage: $0 ORACLE_HOME"
else
...
设置CentOS7,8开机执行/etc/rc.local文件(CentOS7,8开机不执行/etc/rc.local文件)
给 /etc/rc.d/rc.local 添加 可执行权限
chmod a+x /etc/rc.d/rc.local
将 rc-local 服务设置成开机启动(默认状态是 static,会被其他service服务调用执行。不过还是修改一下,以防那个服务被停用就牵连了)
systemctl enable rc-local
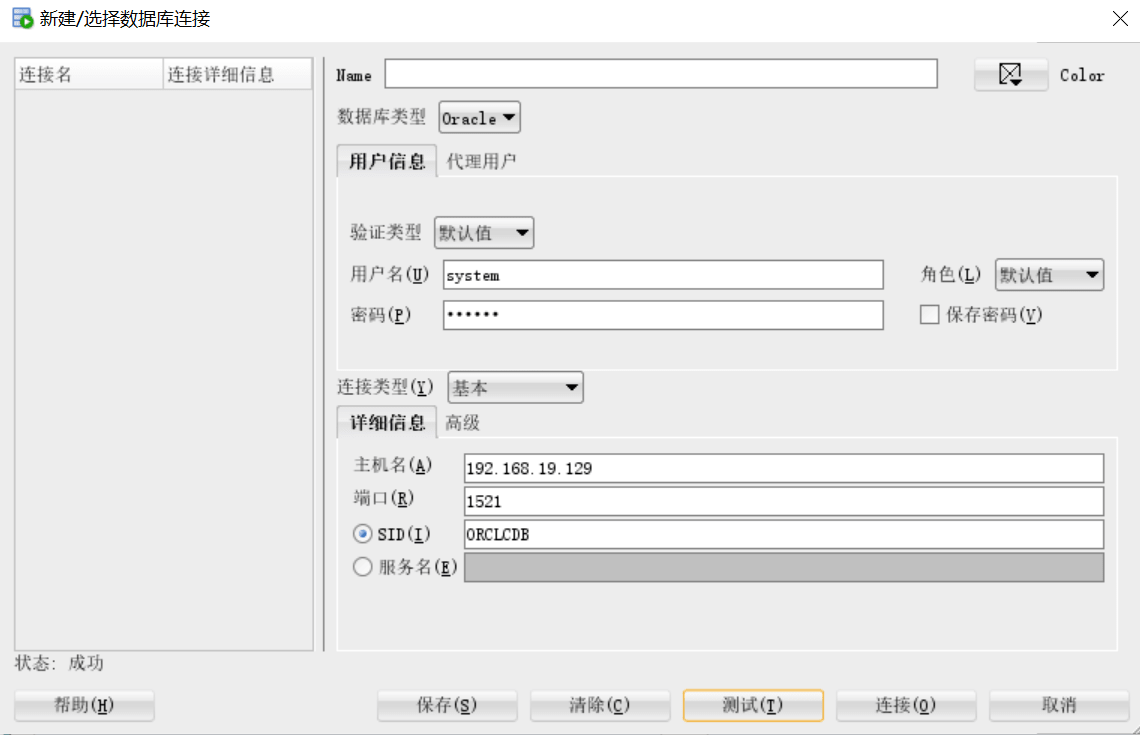
重启,用sqldeveloper链接,验证是否成功
reboot
删除/opt下oracle-database-ee-19c-1.0-1.x86_64.rpm和oracle-database-preinstall-19c-1.0-1.el7.x86_64.rpm
rm /opt/oracle-database-ee-19c-1.0-1.x86_64.rpm /opt/oracle-database-preinstall-19c-1.0-1.el7.x86_64.rpm
到此这篇关于CentOS7下Oracle19c rpm安装过程的文章就介绍到这了,更多相关Oracle19c rpm安装内容请搜索以前的文章或继续浏览下面的相关文章希望大家以后多多支持!