因为近期公司需要搭建一个YUM源服务器给大量的linux(mini)使用,所以因此在网上找了很多的教程,却没有一个特别详细的,很多都有遗漏,参差不齐。所以,打算自己做完之后方便以后查阅,特出此文档。
一:要求
1.这个yum源服务器要能够定期自动更新自身源
2.使用CentOS官方标准源version6和version7的两个版本保持更新
3.linux(mini)客户端可以在使用的时候直接使用源,比如直接命令:yum –y install pcre*
二、思路
1.能够定期更新的源,肯定是需要计划任务通过执行命令脚本来实现
2.国内的不错的源
http://mirrors.aliyun.com/ (阿里云)
http://centos.ustc.edu.cn/centos/ (中国科学技术大学,教育网线路 -官方镜像)
在我安装的时候,我特意去查找了一下资料,大部分的这类镜像服务,都关闭了rsync的直接同步功能,为的是节省公用带宽。包括目前的中国科学技术大学,有明确的通知。
所以我最终会使用reposync来实现同步。
3.要让客户端可以直接使用源,只用更改其/etc/yum.repo.d/下repo文件内容就可以了,后面会有讲到。
三、搭建yum源的server端
1.首先关闭防护墙或者设置规则通过且关闭selinux
Systemctl diablefirewalld 永久关闭防火墙
vim/etc/sysconfig/selinux 并修改SELINUX=enforce行为SELINUX=disabled
2.安装Nginx、createrepo 、yum-plugin-priorities
首先安装yum –y install Nginx 安装html的网站服务器
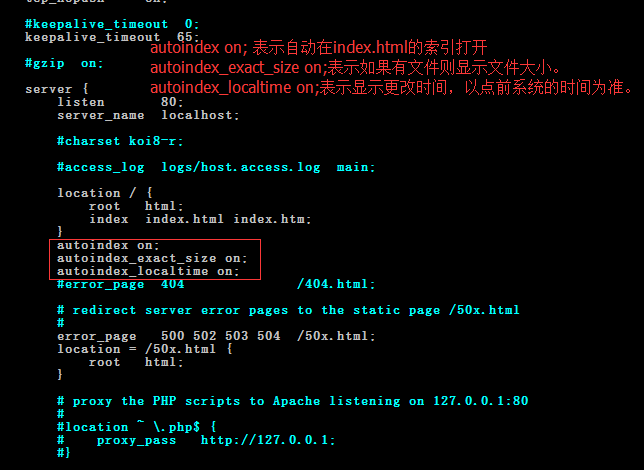
这里建议使用Nginx来进行安装,因为使用Nginx的工具,可以开启文件大小以及修改时间的显示,在配置文件内修改如下:(如果没有这几项请手动添加)
yum –y install createrepo 安装建yum源仓库的工具,可以用来建立yum仓库
yum –y install yum-plugin-priorities 安装控制yum源更新优先级工具,这个工具可以用来控制进行yum源检索的先后顺序,建议可以用在client端。
四、安装完成后的调试
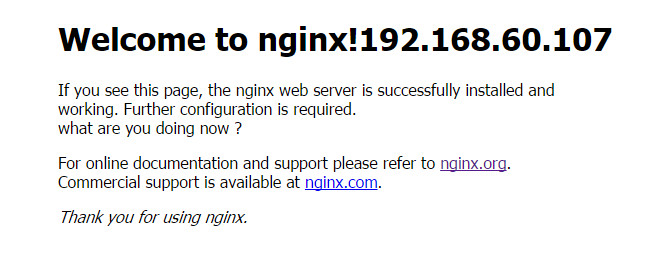
1.当nginx安装完成以后,默认的根文件目录为html即:
我的nginx是安装在/usr/local/nginx-1.11.2/所以默认的根目录也为:
/usr/local/nginx-1.11.2/html如果安装成功,且相应的权限都有,那么可以打开nginx的欢迎页面:(页面上的地址是我修改html.conf文件得来的。)
那么在html下面建立以下目录:
mkdir –p /usr/local/nginx-1.11.2/html/CentOS-YUM/CentOS/version_6.6/64bit/
mkdir –p /usr/local/nginx-1.11.2/html/CentOS-YUM/CentOS/version_7.0/64bit/
mkdir –p /usr/local/nginx-1.11.2/html/CentOS-YUM/Aliyun/version_6.6/64bit/
mkdir –p /usr/local/nginx-1.11.2/html/CentOS-YUM/Aliyun/version_7.0/64bit/
且不要忘记给目录增加可读和可执行权限,否则在web页面显示不出来。
Chmod –R +x /usr/local/nginx-1.11.2/html/
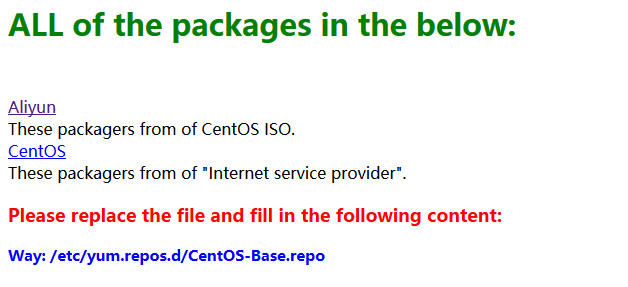
在web的index.html首页里面添加指向文件目录的超链接:
---------------------------------------------------------------------------------------------------------------------------
<p style="font-weight:bolder;color:green;font-size:30px;">ALL of the packages in the below:</p>
<br/>
<a href="http://10.20.0.50/CentOS-YUM/Aliyun">Aliyun</a><br/>
These packagers from of CentOS ISO.<br/>
<a href="http://10.20.0.50/CentOS-YUM/CentOS">CentOS</a><br/>
These packagers from of "Internet service provider".<br/>
<p style="font-weight:bolder;color:red;font-size:18px;">Please replace the file and fill in the following content:</p>
<p style="font-weight:bolder;color:blue;font-size:15px;">Way: /etc/yum.repos.d/CentOS-Base.repo</p>
-------------------------------------------------------------------------------------------------------------------------------------------------------------
五、修改当前系统yum来源repo文件
文件位置:/etc/yum.repos.d/CentOS-Base.repo
1.首先对此文件进行备份,因为当前系统的所有yum软件包的安装或者更新都是来自于这个文件的指定路径的更新。
cp –p /etc/yum.repos.d/CentOS-Base.repo(空格)/etc/yum.repos.d/CentOS-Base.repo.back
通过cat /CentOS-Base.repo打开的可以看到如下所示:(因为当前系统是7)
===================================================================
# CentOS-Base.repo
#
# The mirror system uses the connecting IP address of the client and the
# update status of each mirror to pick mirrors that are updated to and
# geographically close to the client. You should use this for CentOS updates
# unless you are manually picking other mirrors.
#
# If the mirrorlist= does not work for you, as a fall back you can try the
# remarked out baseurl= line instead.
#
#
[base]
name=CentOS-$releasever - Base
mirrorlist=http://mirrorlist.centos.org/?release=$releasever&arch=$basearch&repo=os&infra=$infra
#baseurl=http://mirror.centos.org/centos/$releasever/os/$basearch/
gpgcheck=1
gpgkey=file:///etc/pki/rpm-gpg/RPM-GPG-KEY-CentOS-7
#released updates
[updates]
name=CentOS-$releasever - Updates
mirrorlist=http://mirrorlist.centos.org/?release=$releasever&arch=$basearch&repo=updates&infra=$infra
#baseurl=http://mirror.centos.org/centos/$releasever/updates/$basearch/
gpgcheck=1
gpgkey=file:///etc/pki/rpm-gpg/RPM-GPG-KEY-CentOS-7
#additional packages that may be useful
[extras]
name=CentOS-$releasever - Extras
mirrorlist=http://mirrorlist.centos.org/?release=$releasever&arch=$basearch&repo=extras&infra=$infra
#baseurl=http://mirror.centos.org/centos/$releasever/extras/$basearch/
gpgcheck=1
gpgkey=file:///etc/pki/rpm-gpg/RPM-GPG-KEY-CentOS-7
#additional packages that extend functionality of existing packages
[centosplus]
name=CentOS-$releasever - Plus
mirrorlist=http://mirrorlist.centos.org/?release=$releasever&arch=$basearch&repo=centosplus&infra=$infra
#baseurl=http://mirror.centos.org/centos/$releasever/centosplus/$basearch/
gpgcheck=1
enabled=0
gpgkey=file:///etc/pki/rpm-gpg/RPM-GPG-KEY-CentOS-7
#contrib - packages by Centos Users
[contrib]
name=CentOS-$releasever - Contrib
mirrorlist=http://mirrorlist.centos.org/?release=$releasever&arch=$basearch&repo=contrib&infra=$infra
#baseurl=http://mirror.centos.org/centos/$releasever/contrib/$basearch/
gpgcheck=1
enabled=0
gpgkey=file:///etc/pki/rpm-gpg/RPM-GPG-KEY-CentOS-7
=============================================================
由此可以看出当前是CentOS-7的linux系统,使用的是标准的CentOS官方源
2.因为当前的系统是CentOS-7的版本,那么如果从CentOS官方现在就进行同步,那么同步到的只能是CentOS7的版本的所有yum源,那么相对的如果要同步6版本的yum源,将CentOS-Base.repo的文件内的7的版本号更改为6就可以了。即:

3.接下来去阿里云的官方网站下载阿里云的CentOS-Base.repo文件,如下所示:
wget -O /etc/yum.repos.d/CentOS-Base.repo http://mirrors.aliyun.com/repo/Centos-5.repo
wget -O /etc/yum.repos.d/CentOS-Base.repo http://mirrors.aliyun.com/repo/Centos-6.repo
wget -O /etc/yum.repos.d/CentOS-Base.repo http://mirrors.aliyun.com/repo/Centos-7.repo
这里是三个版本的阿里云yum源下载地址,这里下载6和7就可以了。就下载到
/etc/yum.repos.d/Aliyun/的目录下面就好了。而Aliyun的CentOS-6.repo文件内容如下所示:
================================================================
# CentOS-Base.repo
#
# The mirror system uses the connecting IP address of the client and the
# update status of each mirror to pick mirrors that are updated to and
# geographically close to the client. You should use this for CentOS updates
# unless you are manually picking other mirrors.
#
# If the mirrorlist= does not work for you, as a fall back you can try the
# remarked out baseurl= line instead.
#
#
[base]
name=CentOS-$releasever - Base - mirrors.aliyun.com
failovermethod=priority
baseurl=http://mirrors.aliyun.com/centos/$releasever/os/$basearch/
http://mirrors.aliyuncs.com/centos/$releasever/os/$basearch/
#mirrorlist=http://mirrorlist.centos.org/?release=$releasever&arch=$basearch&repo=os
gpgcheck=1
gpgkey=http://mirrors.aliyun.com/centos/RPM-GPG-KEY-CentOS-6
#released updates
[updates]
name=CentOS-$releasever - Updates - mirrors.aliyun.com
failovermethod=priority
baseurl=http://mirrors.aliyun.com/centos/$releasever/updates/$basearch/
http://mirrors.aliyuncs.com/centos/$releasever/updates/$basearch/
#mirrorlist=http://mirrorlist.centos.org/?release=$releasever&arch=$basearch&repo=updates
gpgcheck=1
gpgkey=http://mirrors.aliyun.com/centos/RPM-GPG-KEY-CentOS-6
#additional packages that may be useful
[extras]
name=CentOS-$releasever - Extras - mirrors.aliyun.com
failovermethod=priority
baseurl=http://mirrors.aliyun.com/centos/$releasever/extras/$basearch/
http://mirrors.aliyuncs.com/centos/$releasever/extras/$basearch/
#mirrorlist=http://mirrorlist.centos.org/?release=$releasever&arch=$basearch&repo=extras
gpgcheck=1
gpgkey=http://mirrors.aliyun.com/centos/RPM-GPG-KEY-CentOS-6
#additional packages that extend functionality of existing packages
[centosplus]
name=CentOS-$releasever - Plus - mirrors.aliyun.com
failovermethod=priority
baseurl=http://mirrors.aliyun.com/centos/$releasever/centosplus/$basearch/
http://mirrors.aliyuncs.com/centos/$releasever/centosplus/$basearch/
#mirrorlist=http://mirrorlist.centos.org/?release=$releasever&arch=$basearch&repo=centosplus
gpgcheck=1
enabled=0
gpgkey=http://mirrors.aliyun.com/centos/RPM-GPG-KEY-CentOS-6
#contrib - packages by Centos Users
[contrib]
name=CentOS-$releasever - Contrib - mirrors.aliyun.com
failovermethod=priority
baseurl=http://mirrors.aliyun.com/centos/$releasever/contrib/$basearch/
http://mirrors.aliyuncs.com/centos/$releasever/contrib/$basearch/
#mirrorlist=http://mirrorlist.centos.org/?release=$releasever&arch=$basearch&repo=contrib
gpgcheck=1
enabled=0
gpgkey=http://mirrors.aliyun.com/centos/RPM-GPG-KEY-CentOS-6
==================================================================
而同样的,如果需要7也可以直接修改文件内的版本号。
六、进行同步脚本的创建并执行同步
vim /etc/yum.repos.d/yum.reposync.sh
--------------------------------------------------------
#!bin/bash
reposync –p /usr/local/nginx-1.11.2/html/CentOS-YUM/CentOS/version_7.0/64bit/
/usr/bin/sed -i "s/7/6/g" `grep 7 -rl /etc/yum.repos.d/CentOS-Base.repo`
reposync –p /usr/local/nginx-1.11.2/html/CentOS-YUM/CentOS/version_6.6/64bit/
cat /etc/yum.repos.d/Aliyun/CentOS-6.repo > /etc/yum.repos.d/CentOS-Base.repo
reposync –p /usr/local/nginx-1.11.2/html/CentOS-YUM/Aliyun/version_6.6/64bit/
/usr/bin/sed -i "s/6/7/g" `grep 6 -rl /etc/yum.repos.d/CentOS-Base.repo`
reposync –p /usr/local/nginx-1.11.2/html/CentOS-YUM/Aliyun/version_7.0/64bit/
cat /etc/yum.repos.d/CentOS-Base.repo.back > /etc/yum.repos.d/CentOS-Base.repo
------------------------------------------------------------------------------------------------------------------
脚本内一共九行命令。
第二行中的“-p”意思为指定同步到目录,此行同步CentOS7的版本yum源
第三行是替换CentOS-Base.repo文本中的所有数字为7的数字更改为6
第四行是同步CentOS6的版本yum源
第五行是将阿里云的CentOS-Base.repo文件对CentOS官方CentOS-Base.repo的文件进行替换所有内容。
第六行开始同步阿里云的6版本的yum源
第七行更改阿里云的CentOS-Base.repo文件为7版本
第八行开始同步阿里云的7版本的yum源
第九行进行还原替换,将阿里云的CentOS-Base.repo 文件替换为CentOS官方6版本的CentOS-Base.repo文件,以便下次,跟这两个官方进行计划同步的时候可以方便些。
(我试过将两个yum源repo文件合并,但是会出错,当然不排除还有其他方式。)
完成以后,执行这个文件,要给这个文件添加执行权限
chmod +x yum.reposync.sh
然后执行脚本
sh yum.reposync.sh
等待下载同步完成。。。。。
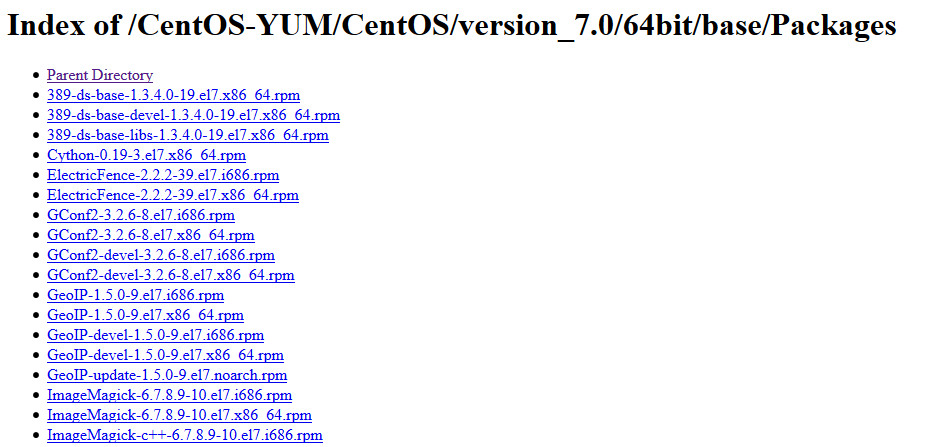
同步完成以后,就可以在相应的目录下面看到各种rpm的安装包:
注意如果是同步到比如这个目录:
/usr/local/nginx-1.11.2/html/CentOS-YUM/CentOS/version_7.0/64bit/
那么在64bit的目录下面就会生成三个目录,是跟官方源同步的:
Base/
Extras/
Updates/
这样yum源的server端就建立好了。然后进行建仓,即yum源仓库,供client端检索使用:
(因为建仓最终的目的也是可供client来进行检索的,所以得每个Packages目录都要建成仓库,所以建仓的时候,
目录到指到最底层的Packages,而-np更新的时候只用指定到64bit的目录就可以了,否则会重复建立base、extras、updates三个目录进行下载)
createrepo -p /usr/local/nginx-1.11.2/html/CentOS-YUM/CentOS/version_6.6/64bit/base/Packages
createrepo -p /usr/local/nginx-1.11.2/html/CentOS-YUM/CentOS/version_7.0/64bit/base/Packages
createrepo -p /usr/local/nginx-1.11.2/html/CentOS-YUM/Aliyun/version_6.6/64bit/base/Packages
createrepo -p /usr/local/nginx-1.11.2/html/CentOS-YUM/Aliyun/version_7.0/64bit/base/Packages
当然也可以是,比如:
createrepo -p /usr/local/nginx-1.11.2/html/CentOS-YUM/Aliyun/version_7.0/64bit/base/Packages (空格) /usr/local/nginx-1.11.2/html/CentOS-YUM/Aliyun/version_7.0/64bit/base/Packages
当yum源仓库建立好以后,会在对应的目录下面出现“repodata”的目录。如下图所示:
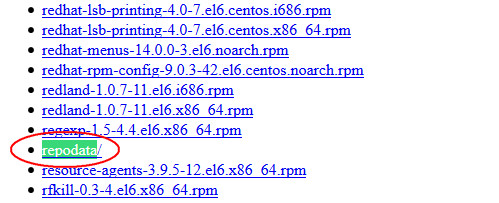
接下来client端配置后就可以直接使用这些YUM源。
七、客户端Client的yum配置:
1.安装优先级软件:
使用yum来安装yum install -y yum-plugin-priorities
这个是优先级工具,可以控制client端进行yum源的先后使用查找。
2.首先对client端的/etc/yum.repos.d/目录下的repo文件进行更改。
mkdir –p /etc/yum.repos.d/back
mv /etc/yum.repos.d/*/etc/yum.repos.d/back/
vim /etc/yum.repos.d/CentOS-Base.repo
-----------------------------------------------------------------------
[mylocal]
name=source_from_localserver #这里是整合到server端的centos6的光盘镜像yum源
baseurl=http://10.20.0.50/centos/6.6/x86_64/Packagers/
gpgcheck=0
enable=1
priority=1 #这里的priority就是上面安装的优先级工具,设定从小到大
[Aliyun_6.6_base]
name=source_from_localserver
baseurl=http://10.20.0.50/CentOS-YUM/Aliyun/version_6.6/64bit/base/Packages
gpgcheck=0
enable=1
priority=2
[Centos_6.6_base]
name=source_from_localserver
baseurl=http://10.20.0.50/CentOS-YUM/CentOS/version_6.6/64bit/base/Packages
gpgcheck=0
enable=1
priority=3
[Aliyun_6.6_extras]
name=source_from_localserver
baseurl=http://10.20.0.50/CentOS-YUM/Aliyun/version_6.6/64bit/extras/Packages
gpgcheck=0
enable=1
priority=4
[Centos_6.6_extras]
name=source_from_localserver
baseurl=http://10.20.0.50/CentOS-YUM/CentOS/version_6.6/64bit/extras/Packages
gpgcheck=0
enable=1
priority=5
[Aliyun_6.6_updates]
name=source_from_localserver
baseurl=http://10.20.0.50/CentOS-YUM/Aliyun/version_6.6/64bit/updates/Packages
gpgcheck=0
enable=1
priority=6
[Centos_6.6_updates]
name=source_from_localserver
baseurl=http://10.20.0.50/CentOS-YUM/CentOS/version_6.6/64bit/updates/Packages
gpgcheck=0
enable=1
priority=7
---------------------------------------------------------------------------------------------------------------------------
3.然后进行本利的缓存的清理和建立
yum clean all 清除所有缓存
yum makecache 建立缓存
yum repolist 查看yum源列表
当缓存建立好以后,就可以在client端直接使用yum进行安装软件包了。而检索的顺序就是根据优先级来的。

上面添加的这里都有了,测试了一下安装firefox,而实际firefox来自于这些仓库:
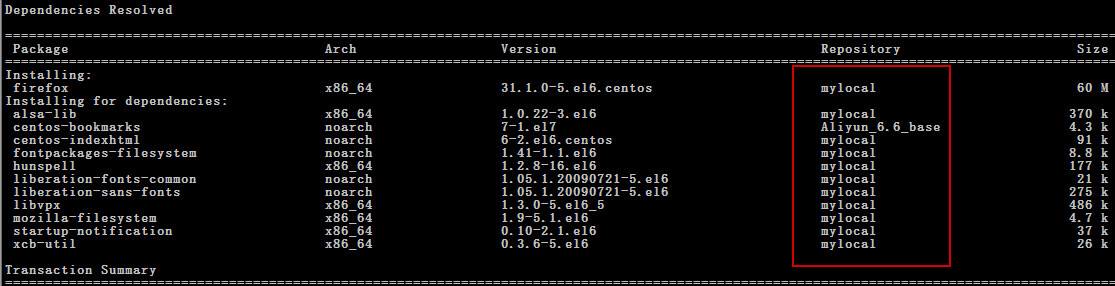
最后安装成功。
如果安装不成功,报出有关kernel的错误,那么请检查当前系统版本以及repo文件对应的跟目录中的软件包版本。
好啦,到这里,client端也已经配置好了,那么接下来,得考虑下让服务器端能够自动定时更新软件包,否则每次都要手动更新,岂不是很累。
八、配置server端的yum源自动更新机制
1.首先来写一个bash脚本在/home/crontab/下,这个脚本的作用说白了就是通过一条一条自动执行,最终达到,自动更新yum源的目的,代码如下:
-----------------------------------------------------------------------------------------------------------------------------
#!bin/bash
/usr/bin/reposync -np /usr/local/nginx-1.11.2/html/CentOS-YUM/CentOS/version_7.0/64bit/
/usr/bin/sed -i "s/7/6/g" `grep 7 -rl /etc/yum.repos.d/CentOS-Base.repo`
/usr/bin/reposync -np /usr/local/nginx-1.11.2/html/CentOS-YUM/CentOS/version_6.6/64bit/
cat /etc/yum.repos.d/CentOS-Base.aliyun.repo.bak > /etc/yum.repos.d/CentOS-Base.repo
/usr/bin/reposync -np /usr/local/nginx-1.11.2/html/CentOS-YUM/Aliyun/version_6.6/64bit/
/usr/bin/sed -i "s/6/7/g" `grep 6 -rl /etc/yum.repos.d/CentOS-Base.repo`
/usr/bin/reposync -np /usr/local/nginx-1.11.2/html/CentOS-YUM/Aliyun/version_7.0/64bit/
cat /etc/yum.repos.d/CentOS-Base.repo.bak > /etc/yum.repos.d/CentOS-Base.repo
------------------------------------------------------------------------------------------------------------------------------
“-np”的意思为仅仅更新新更新的软件到指定目录
其他的跟第六步的语句是一个意思。
注意下载的repo的文件版本,要能够对应,不然会报错,可自己改动脚本。
然后再来添加定时计划:
vim /etc/crontab
0 2 * * 6 rootrun-parts /home/crontab/oderforrepo.sh
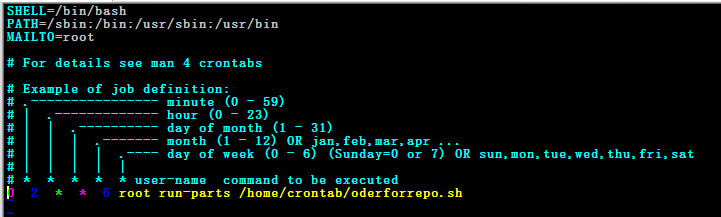
这个定时任务表示:每周6的晚上凌晨2点开始执行oderforrepo.sh的脚本.
这样就可以自动更新yum源了。
最后记得查看本地系统的系统时间,如果觉得有必要可以将时间同步。