所有的人都想停留在那山顶,但是所有的乐趣和成长都是发生在往上爬的过程中。新的一天,早安!
本文介绍了vue不操作dom实现图片轮播的示例代码,分享给大家,具体如下:
效果
宽度为1190px且水平居中的轮播盒子; 中间是当前显示的默认尺寸图片; 左右两边是预显示的小尺寸图片; 轮播从右至左,图片逐渐放大。

做普通平滑轮播也可以参照这个思路
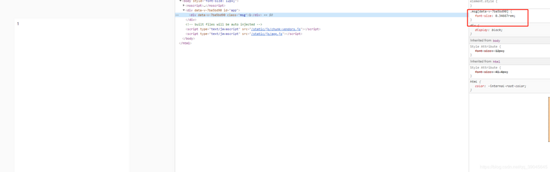
html

<ul>
 <li
	v-for="(demo,index) in demoList"
	:key="index"
	:class="{'demo-left':demoStyle(index) == 0,'demo-active':demoStyle(index) == 1,'demo-right':demoStyle(index) == 2}"
 >
	<img :src="demo.img" alt />
 </li>
</ul>
css
我们要写上三个li不同位置的样式和一个li默认位置的的样式。 分别是: 左边位置的dom样式; 中间位置的dom样式; 右边位置的dom样式; 默认位置的dom样式。 其中,默认的dom隐藏在中间展示的dom下面。 看图:

图中:
ul的样式:
ul {
 position: relative;
 width: 1190px;
 height: 500px;
 margin: 0 auto;
 display: flex;
}
紫色部分是默认的li的dom样式,设置在整个ul水平且垂直居中的位置
ul > li {
 position: absolute;
 width: 480px;
 min-width: 480px;
 height: 400px;
 top: 50px;
 bottom: 50px;
 left: 355px;
 font-size: 0;	/* 去除img标签留白,与轮播无关 */
 overflow: hidden;
 background: white;
 box-shadow: 0 0 10px 0 #dddddd;
 transition: 0.6s;
 z-index: 1;
}
红色部分是左边的li的dom样式,设置在整个ul水平靠左、垂直居中的位置
ul > .demo-left {
 left: 0;
 z-index: 2;
}
黑色部分是中间需要展示的li的dom样式,设置在整个ul水平靠右、垂直居中的位置
ul > .demo-active {
 width: 600px;
 min-width: 600px;
 height: 500px;
 top: 0;
 bottom: 0;
 left: 295px;
 z-index: 3;
}
蓝色部分是右边的li的dom样式,设置在整个ul水平靠右、垂直居中的位置
ul > .demo-right {
 left: 710px;
 z-index: 2;
}
图片水平且垂直居中,可自定义设置,与轮播无关
ul > li > img {
 position: absolute;
 width: 100%;
 top: 0;
 right: 0;
 bottom: 0;
 left: 0;
 margin: auto;
}
vue
export default {
name: "demo",
data() {
return {
demoList: [ // 图片列表
{
id: "1",
src: "图片路径"
},
{
id: "2",
src: "图片路径"
},
{
id: "3",
src: "图片路径"
},
{
id: "4",
src: "图片路径"
},
{
id: "5",
src: "图片路径"
}
],
demoActive: 0, // 当前显示的li下标,设置为0,表示首次加载显示第一张图片
demoTimer: null // 定时器,声明demoTimer方便停止轮播和重新开始轮播
}
},
methods: {
// 根据返回值给li添加className
demoStyle(index) {
if (index == this.demoActive - 1) return 0;
if (index == this.demoActive ) return 1;
if (index == this.demoActive + 1) return 2;
if (this.demoActive == 0 && index == this.demoList.length - 1) return 0;
if (this.demoActive == this.demoList.length - 1 && index == 0) return 2;
},
// 轮播执行
demoCarousel() {
this.demoActive++;
if (this.demoActive > this.demoList.length - 1) {
this.demoActive= 0;
}
}
},
mounted() {
let _self = this;
_self.$nextTick(function () {
// 开始轮播,3秒一次
_self.demoTimer = setInterval(_self.demoCarousel, 3000);
});
}
}
到此这篇关于vue不操作dom如何实现图片轮播的示例代码就介绍到这了。唯一的出路还是学习。更多相关vue不操作dom如何实现图片轮播的示例代码内容请查看相关栏目,小编编辑不易,再次感谢大家的支持!