springboot使用Redis实现分布式缓存
1、环境构建
1.1 通过MybatisX工具逆向功能快速初始化一个工程(springboot+mybatis-plus)
1.2 构建controller层测试各模块的功能
1.3 相同的请求没有实现共享数据,需要开启mybatis的二级缓存
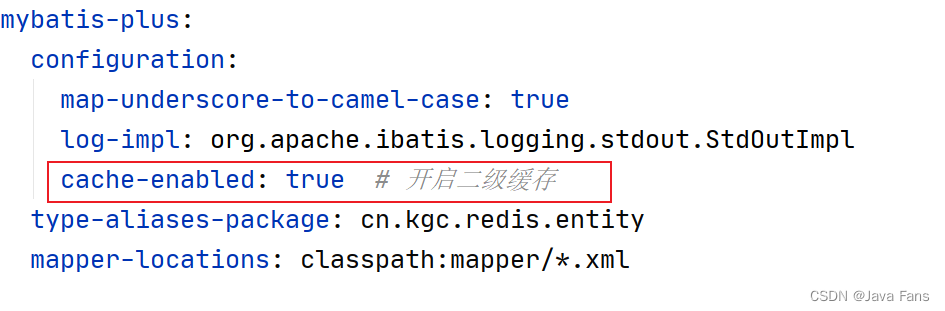
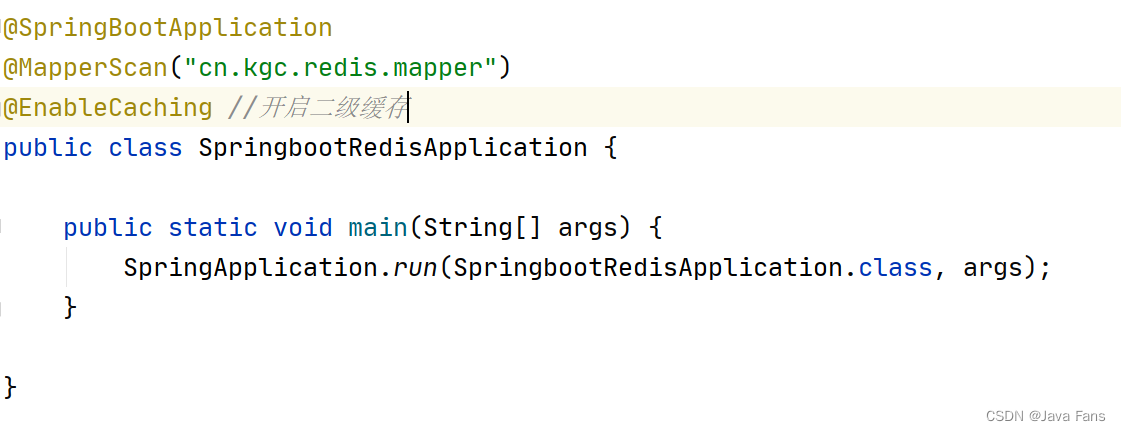
1.4 springboot环境下开启mybatis-plus的二级缓存

1.5编写获取spring工厂的工具类
@Component
public class ApplicationContextUtils implements ApplicationContextAware {

    private  static ApplicationContext applicationContext;

    @Override
    public void setApplicationContext(ApplicationContext applicationContext) throws BeansException {
        this.applicationContext = applicationContext;
    }
    public static Object getBean(String beanName){
        return applicationContext.getBean(beanName);
    }
}
1.6编写Redis缓存类
@Slf4j
public class RedisCache  implements Cache {

    private final String id;

    public RedisCache(String id){
        this.id = id;
    }

    // 操作模块的mapper文件的命名空间 唯一标识符
    @Override
    public String getId() {
        log.info("id= {}",id);
        return this.id;
    }

    // 将数据写入redis
    @Override
    public void putObject(Object key, Object value) {

        log.info("===============将查询的数据开始写入缓存===============");
        RedisTemplate redisTemplate = getRedisTemplate();
        redisTemplate.opsForHash().put(id, key.toString(), value);

        log.info("===============将查询的数据写入缓存完毕===============");

    }

    // 获取缓存中的数据
    @Override
    public Object getObject(Object key) {
        log.info("============开始从缓存中获取数据=============");
        RedisTemplate redisTemplate = getRedisTemplate();
        log.info("============从缓存中获取数据完毕=============");
        return redisTemplate.opsForHash().get(id, key.toString());
    }

    // 移除缓存中的数据
    @Override
    public Object removeObject(Object key) {
        return null;
    }

    // 清空缓存
    @Override
    public void clear() {
        log.info("==========清空缓存=============");
        RedisTemplate redisTemplate = getRedisTemplate();
        redisTemplate.delete(id);
    }

    // 获取缓存的数量
    @Override
    public int getSize() {
        RedisTemplate redisTemplate = (RedisTemplate) 			ApplicationContextUtils.getBean("redisTemplate");
        redisTemplate.setKeySerializer(new StringRedisSerializer());
        redisTemplate.setHashKeySerializer(new StringRedisSerializer());
        int size = redisTemplate.opsForHash().size(id).intValue();
        return size;
    }


    private RedisTemplate getRedisTemplate(){
        RedisTemplate redisTemplate = (RedisTemplate) ApplicationContextUtils.getBean("redisTemplate");
        redisTemplate.setKeySerializer(new StringRedisSerializer());
        redisTemplate.setHashKeySerializer(new StringRedisSerializer());
        return redisTemplate;
    }

}
1.7Redis中有关联关系缓存数据的处理
@CacheNamespaceRef(DeptMapper.class)  // 引用有关联关系的命名空间
public interface EmpMapper extends BaseMapper<Emp> {

}
注:以上设置完成后,两个模块会使用相同的key(命名空间)存储数据到缓存中
1.8 Redis中key进行摘要算法
DigestUtils.md5DigestAsHex(key.toString().getBytes()) // 通过该操作可以减少key的长度
Redis实现主从复制
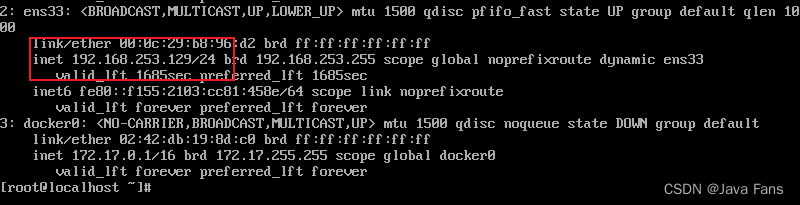
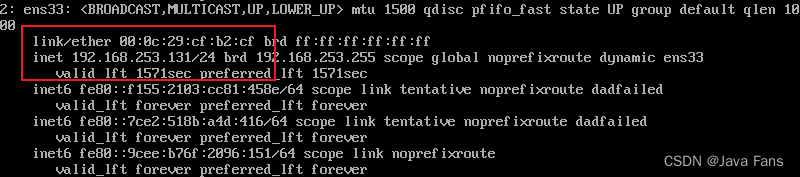
1.准备三台已经安装Redis的虚拟机
2.查看三台虚拟机的ip地址

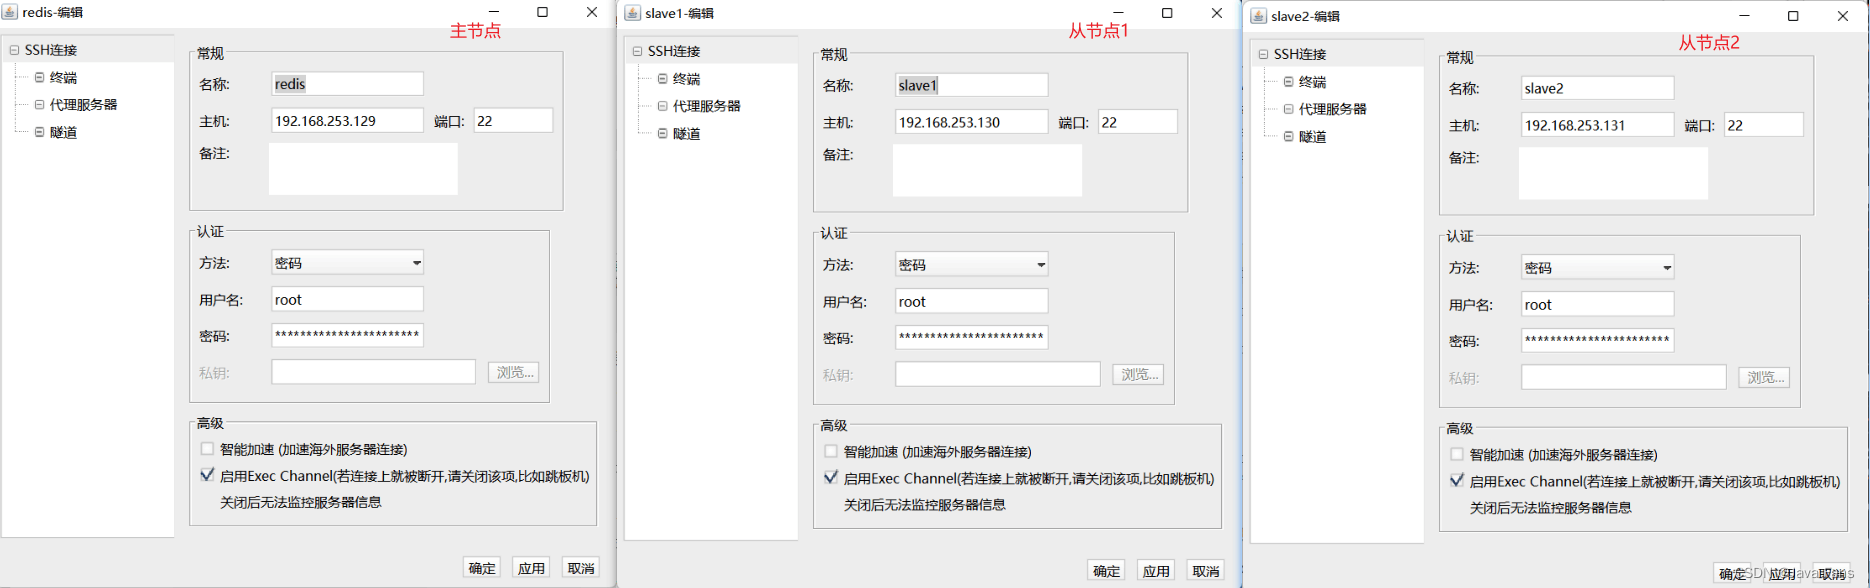
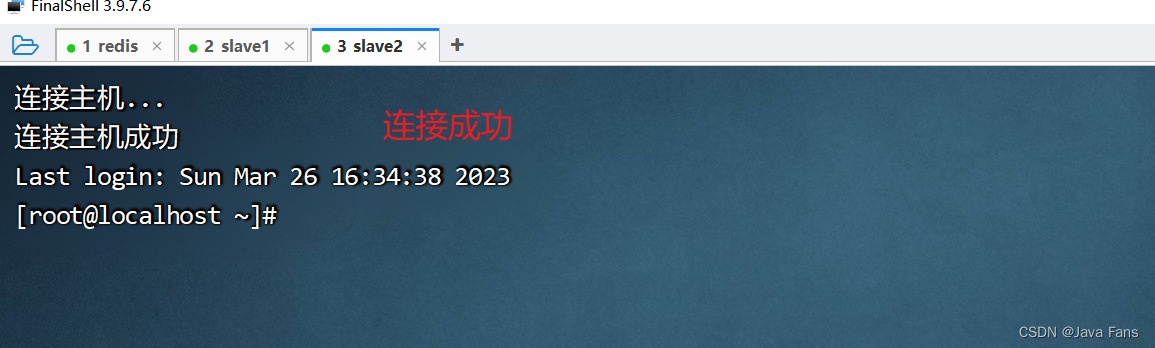
3.通过远程连接工具FinalShell连接
4.修改从节点配置文件
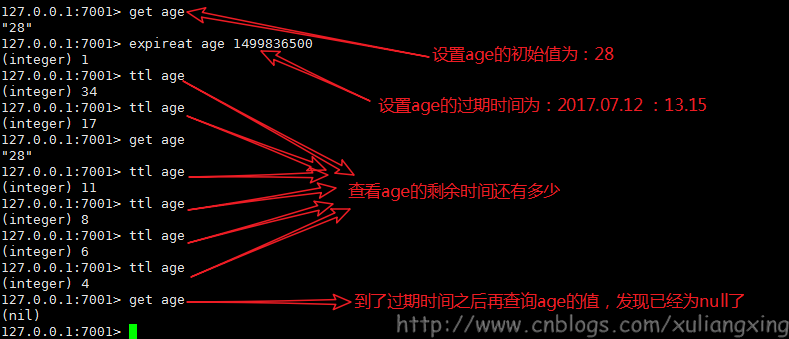
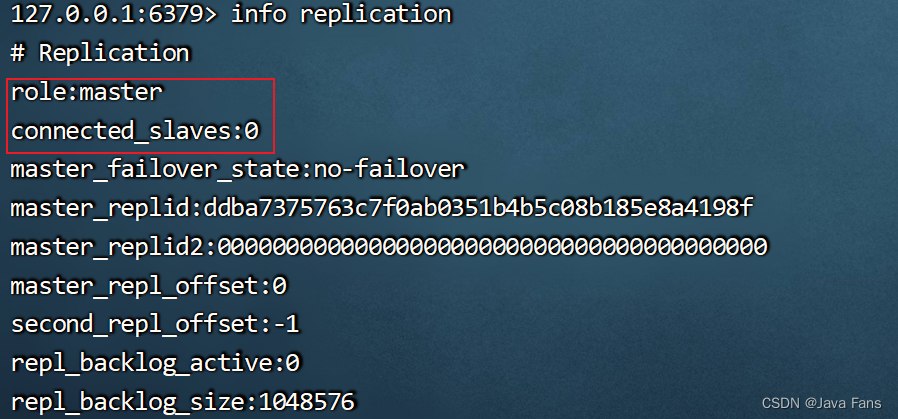
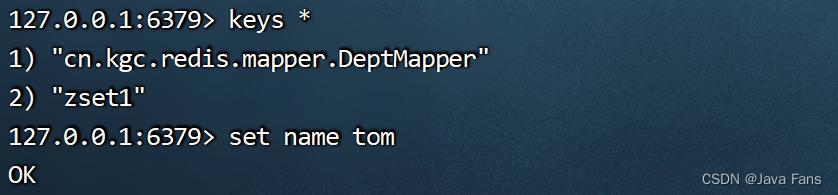
启动三台服务器上的redis后,输入一下命令查看redis主从配置状态
info replication
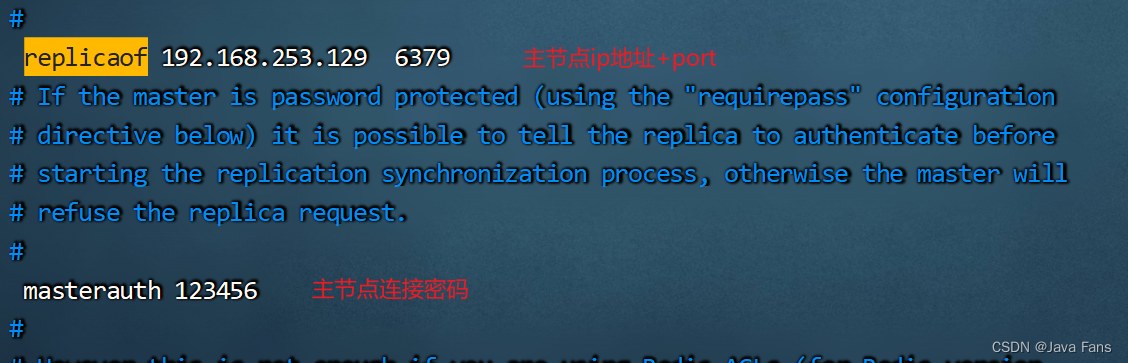
修改从节点服务器的配置文件redis.conf
replicaof  主机ip 主机redis接口
masterauth 密码
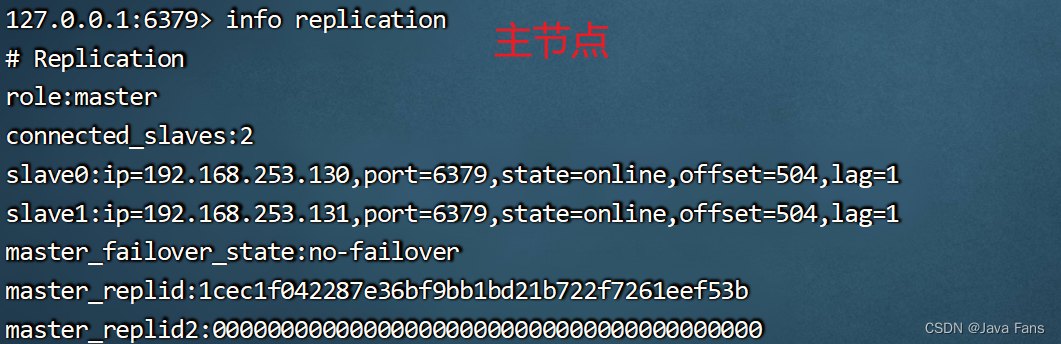
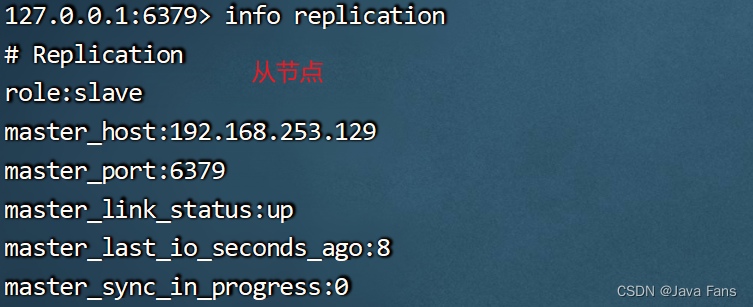
修改后重启两个从机,在主机和从机分别输入一下命令查看如下:
info replication
验证主从架构
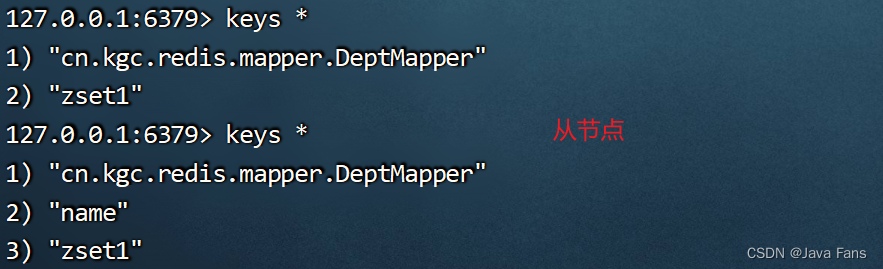
至此主从架构设置完成
Redis集群的构建
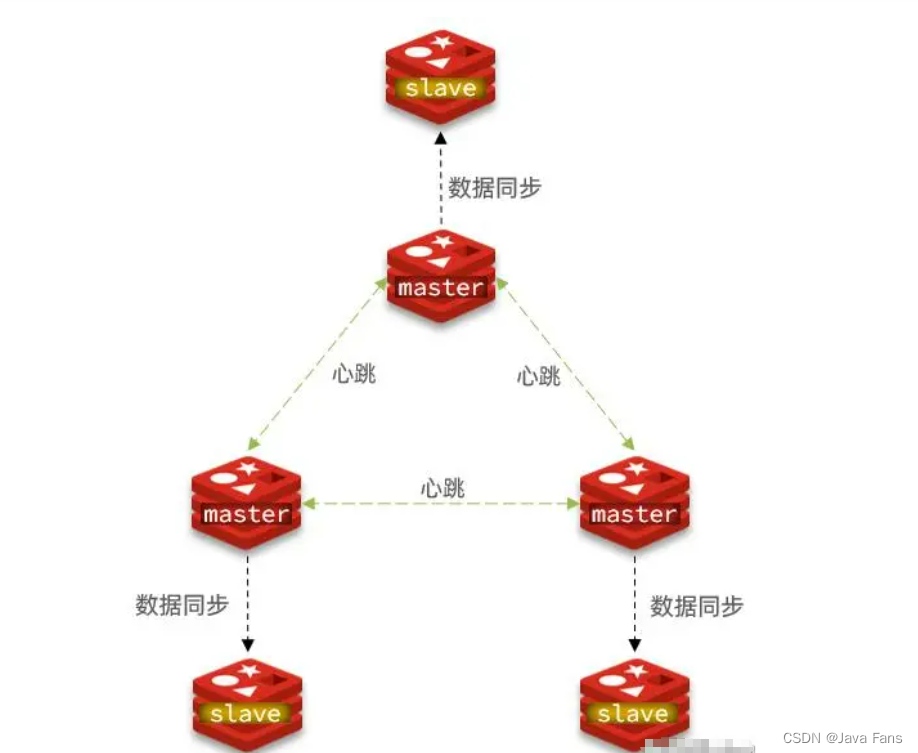
以上结构的集群构建可以在一台虚拟机环境中进行模拟,首先创建一台已经安装好Redis数据库的虚拟机

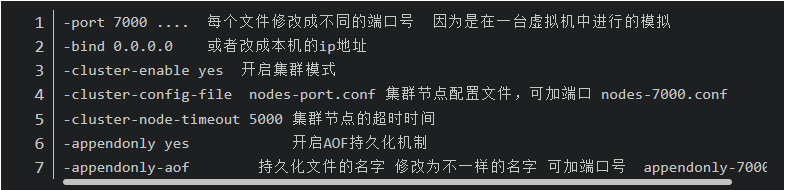
开启虚拟机并在虚拟机的根路径下创建好7000,7001,7002,7003,7004,7005六个文件夹,之后将redis解压目录下的redis.conf配置文件拷贝到以上几个文件夹中,同时按照以下参数完成配置文件的修改

修改配置文件中的参数
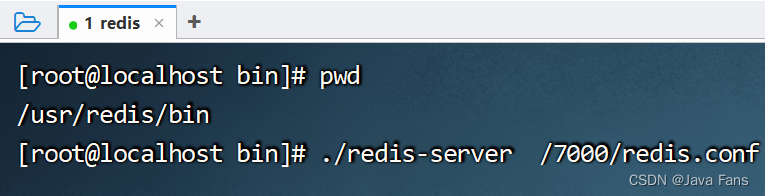
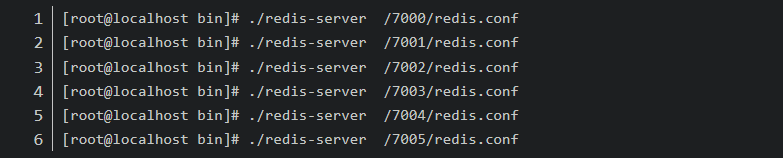
以上6个文件夹中文件全部修改完毕之后,可以按照以下指令启动全部的redis节点
查看redis服务是否已经全部启动成功
ps aux|grep redis

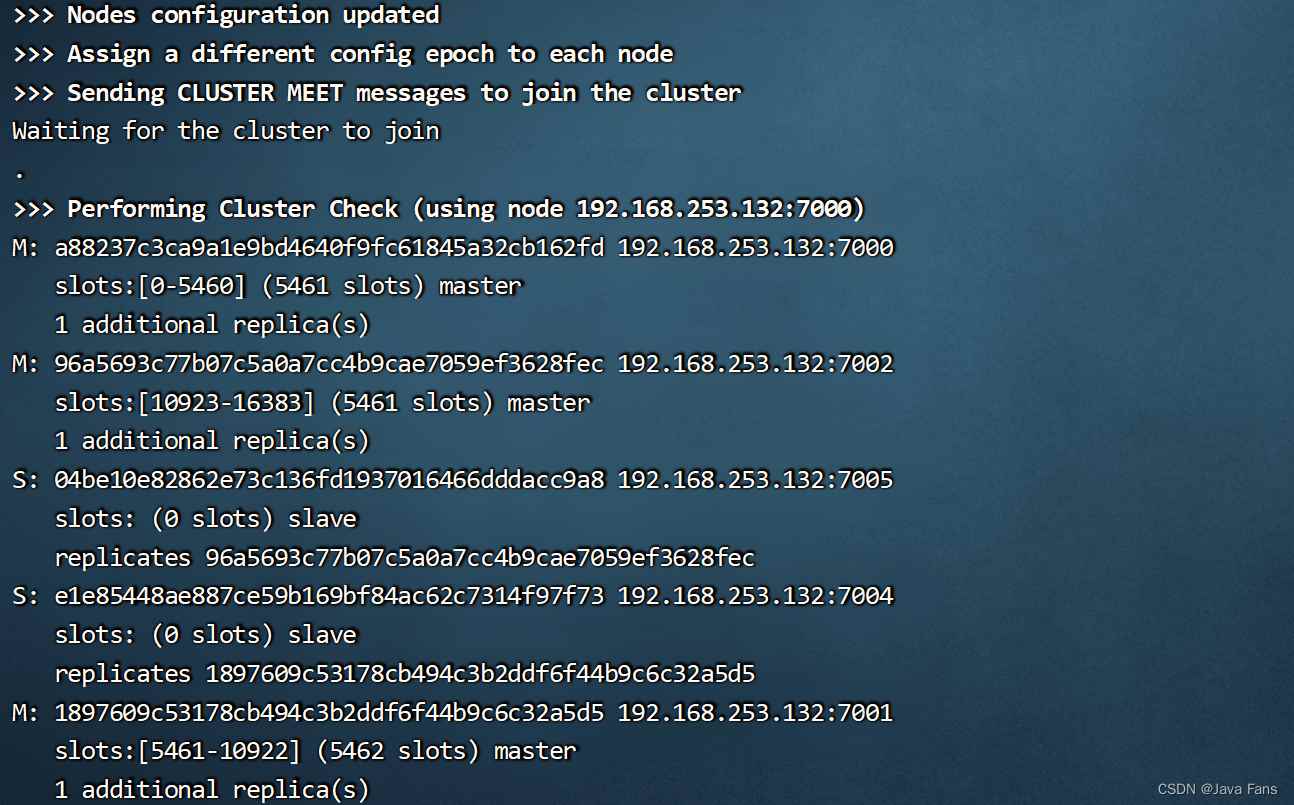
全部启动成功之后,执行以下指令,将多个节点组合成集群,同时实现主从备份
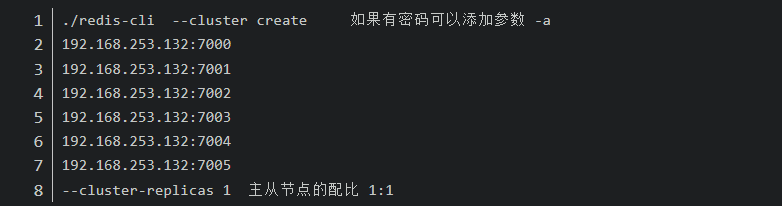

确认集群的主从从节点信息
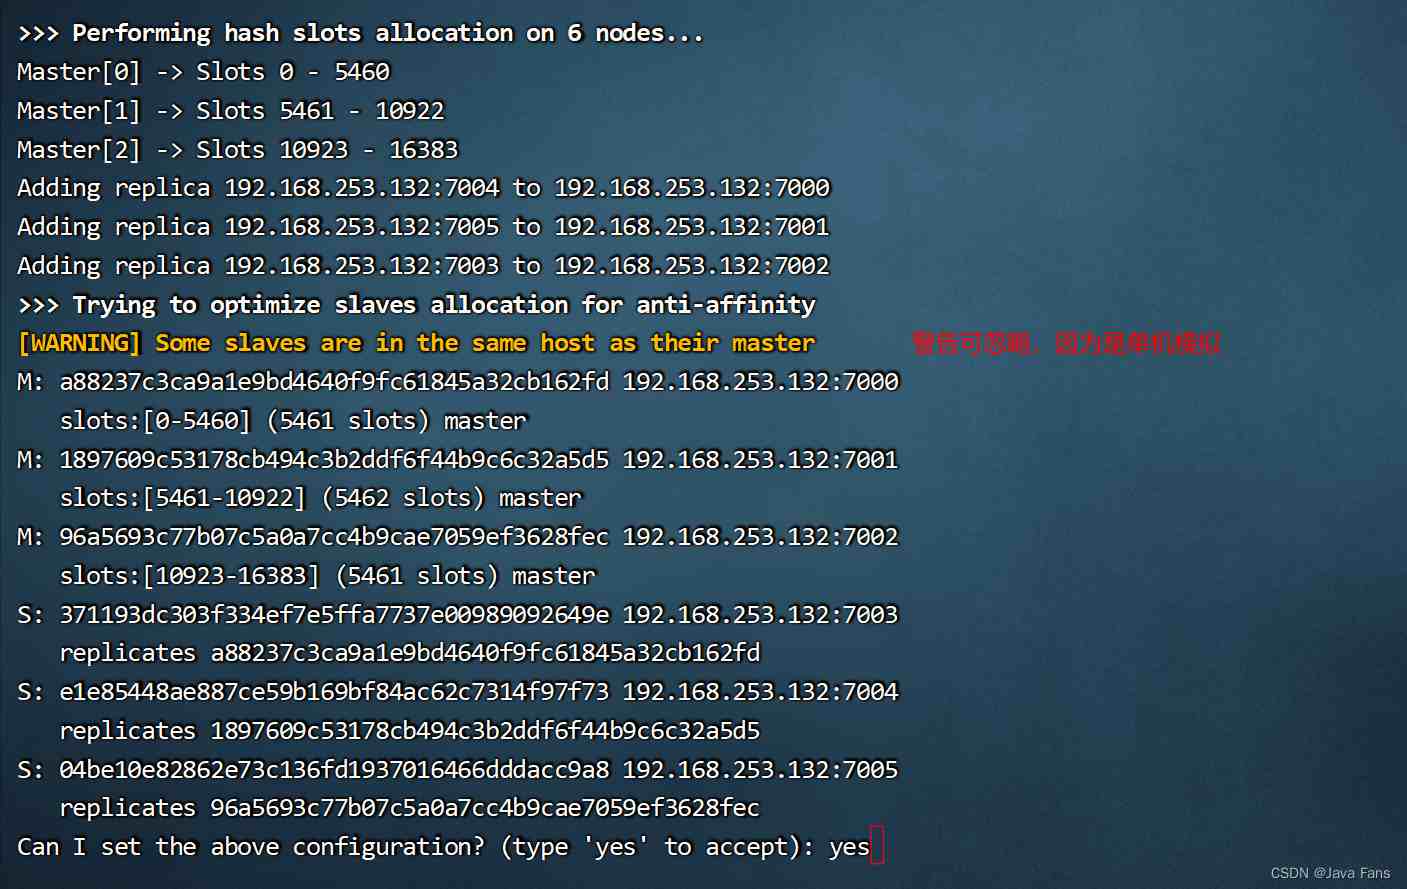
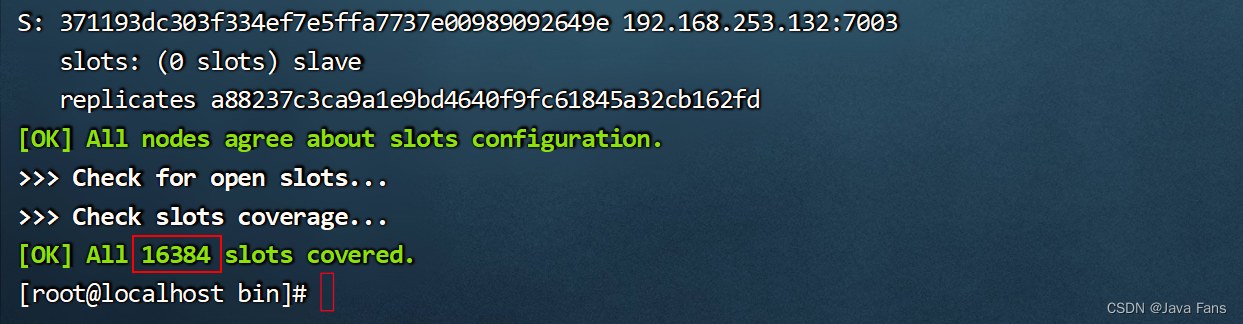
输入yes,确认主从节点信息后,输出以下信息,表示集群构建成功
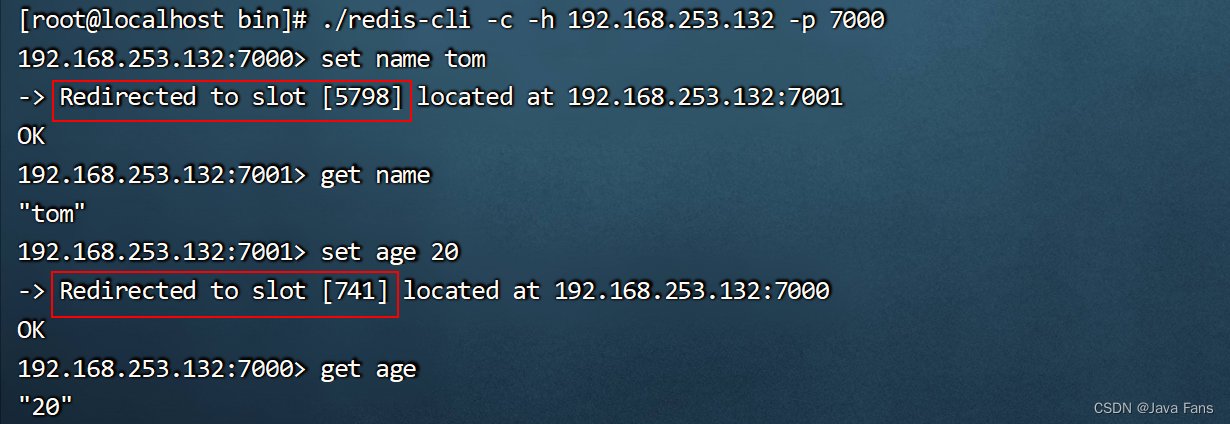
使用一下指令登录集群中的任意节点实现数据的操作,查看集群是否可正常工作
./redis-cli -a cyclone -c -h 192.168.220.11 -p 7001   连接

-a 表示连接密码  没有可省略
-c 表示集群方式进行启动
-h ip 地址
-p 表示端口号
如果在springboot项目中连接Redis集群可按照一下方式进行配置
redis:
    cluster:
       nodes: 192.168.1.1:6379 ,.....
以上就是SpringBoot使用Redis实现分布式缓存的详细内容,更多关于Springboot Redis分布式缓存的资料请关注好代码网其它相关文章!