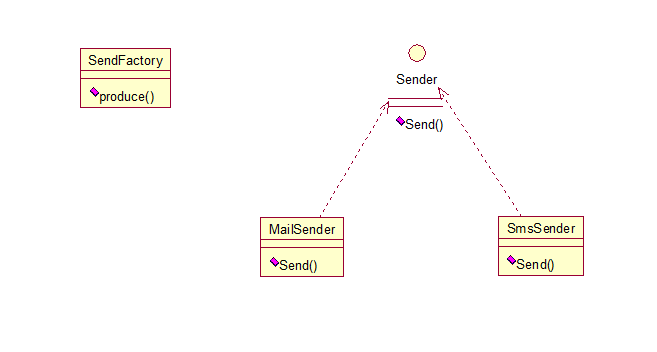
1. Factory Method(工厂方法)
1.1 定义
工厂方法模式(Factory Method Pattern)又叫虚拟构造函数(Virtual Constructor)模式或者多态性工厂(PolymorphicFactory)模式。工厂方法模式的用意是定义一个创建产品对象的工厂接口,将实际创建性工作推迟到子类中,即定义一个用于创建对象的接口,让子类决定实例化哪个类。工厂方法使一个类的实例化延迟到其子类。
1.2 缺点
当产品种类过多,由于每一种产品都需要实现一个工厂类,增加了代码量
1.3 c++源码例程
 1 #include<iostream>
 2 using namespace std;
 3
 4 //定义产品类型
 5 typedef enum{
 6     Product_Type_01,
 7     Product_Type_02
 8 }Product_Type;
 9
10 //定义抽象产品类
11 class Product{
12 public:
13     virtual string getType() = 0;
14 };
15
16 //具体产品类01
17 class Product01:public Product{
18 public:
19     Product01():Product(),m_type("Product01"){
20
21     }
22     string getType(){
23         cout << m_type << endl;
24         return m_type;
25     }
26 private:
27     string m_type;
28 };
29
30 //具体产品类02
31 class Product02:public Product{
32 public:
33     Product02():Product(),m_type("Product02"){
34
35     }
36     string getType(){
37         cout << m_type << endl;
38         return m_type;
39     }
40 private:
41     string m_type;
42 };
43
44 //抽象工厂类
45 class ProductFactory
46  {
47  public:
48      virtual  Product* createProduct() = 0;
49  };
50
51  //具体创建工厂类
52  class Product01Factory
53  {
54  public:
55      virtual  Product* createProduct(){
56          return new Product01();
57      }
58  };
59
60   //具体创建工厂类
61  class Product02Factory
62  {
63  public:
64      virtual  Product* createProduct(){
65          return new Product02();
66      }
67  };
68 int main(){
69     Product01Factory* factory01 = new Product01Factory();
70     Product* product01 =  factory01->createProduct();
71     product01->getType();
72
73     Product02Factory* factory02 = new Product02Factory();
74     Product* product02 =  factory02->createProduct();
75     product02->getType();
76
77     delete product01;
78     product01 = NULL;
79     delete factory01;
80     factory01 = NULL;
81     delete product02;
82     product02 = NULL;
83     delete factory02;
84     factory02 = NULL;
85 }
2. Abstract Factory(抽象工厂)
2.1 定义
为创建一组相关或相互依赖的对象提供一个接口,而且无须指定它们的具体类。抽象工厂模式是工厂方法模式的升级版本。在有多个业务品种、业务分类时,通过抽象工厂模式产生需要的对象是一种非常好的解决方式。
2.2 优点
抽象工厂模式是工厂方法模式的升级版本。在有多个业务品种、业务分类时,通过抽象工厂模式产生需要的对象是一种非常好的解决方式。
2.2 缺点
假如产品族中需要增加一个新的产品,不仅要实现具体的 产品类,而且还要创建相关的工厂接口。
2.3 c++源码示例
  1 #include<iostream>
  2 using namespace std;
  3
  4 //抽象猫类
  5 class Cat{
  6 public:
  7     virtual string getType() = 0;
  8 };
  9
 10 //白颜色猫
 11 class WhiteCat:public Cat{
 12 public:
 13     WhiteCat():Cat(),m_type("WhiteCat"){
 14
 15     }
 16     string getType(){
 17         cout << m_type << endl;
 18         return m_type;
 19     }
 20 private:
 21     string m_type;
 22 };
 23
 24 //黑色猫类
 25 class BlackCat:public Cat{
 26 public:
 27     BlackCat():Cat(),m_type("BlackCat"){
 28
 29     }
 30     string getType(){
 31         cout << m_type << endl;
 32         return m_type;
 33     }
 34 private:
 35     string m_type;
 36 };
 37
 38  //抽象狗类
 39 class Dog{
 40 public:
 41     virtual string getType() = 0;
 42 };
 43
 44 //白色狗类
 45 class WhiteDog:public Dog{
 46 public:
 47     WhiteDog():Dog(),m_type("WhiteDog"){
 48
 49     }
 50     string getType(){
 51         cout << m_type << endl;
 52         return m_type;
 53     }
 54 private:
 55     string m_type;
 56 };
 57
 58 //黑色狗类
 59 class BlackDog:public Dog{
 60 public:
 61     BlackDog():Dog(),m_type("BlackDog"){
 62
 63     }
 64     string getType(){
 65         cout << m_type << endl;
 66         return m_type;
 67     }
 68 private:
 69     string m_type;
 70 };
 71
 72 //抽象工厂类
 73 class Pet
 74  {
 75  public:
 76      virtual  Cat* createCat() = 0;
 77      virtual  Dog* createDog() = 0;
 78  };
 79
 80  //白色宠物工厂
 81 class WhitePetFactory
 82 {
 83 public:
 84      Cat* createCat(){
 85          return new WhiteCat();
 86      }
 87      Dog* creatDog(){
 88          return new WhiteDog();
 89      }
 90 };
 91  //黑色宠物工厂
 92  class BlackPetFactory
 93  {
 94  public:
 95      Cat* createCat(){
 96          return new BlackCat();
 97      }
 98      Dog* creatDog(){
 99          return new BlackDog();
100      }
101  };
3. Builder(建造者)
3.1 定义
将一个复杂对象的构建与它的表示分离,使得同样的构建过程可以创建不同的表示。4. Prototype(原型)
3.2 适用场景
使用建造者模式的典型场景如下。
■ 相同的方法,不同的执行顺序,产生不同的结果时,可以采用建造者模式。
■ 多个部件或零件,都可以装配到一个对象中,但是产生的运行结果又不相同时,则可以使用该模式。
■ 产品类非常复杂,或者产品类中的方法调用顺序不同产生了不同的效能,这个时候使用建造者模式。
■ 在对象创建过程中会使用到系统的一些其他对象,这些对象在产品对象的创建过程中不易得到时,也可以采用建造者模式封装该对象的创建过程。该种场景只能是一个补偿方法,因为一个对象不容易获得,而在设计阶段没有发现,要通过创建者模式柔化创建过程,本身已经违反设计的最初目标。
3.3 c++源码
  1 #include <iostream>
  2 #include <string>
  3
  4 using namespace std;
  5
  6 // 一个产品由零件1 零件2 构成
  7 //具体的产品类
  8 class Product
  9 {
 10 public:
 11     void setPart1(string part1)
 12     {
 13         m_part1 = part1;
 14     }
 15
 16     void setPart2(string part2)
 17     {
 18         m_part2 = part2;
 19     }
 20
 21     string getPart1(){
 22         cout << m_part1 << endl;
 23         return m_part1;
 24     }
 25
 26     string getPart2(){
 27         cout << m_part2 << endl;
 28         return m_part2;
 29     }
 30
 31 private:
 32     string m_part1;
 33     string m_part2;
 34 };
 35
 36 //抽象建造类,提供建造接口。
 37 class OrderBuilder
 38 {
 39 public:
 40     virtual ~OrderBuilder()
 41     {
 42         cout << "~OrderBuilder()" << endl;
 43     }
 44     virtual void setOrderPart1() = 0;
 45     virtual void setOrderPart2() = 0;
 46     virtual Product* getProduct() = 0;
 47 };
 48
 49 //具体的建造类
 50 class FirstOrderBuilder : public OrderBuilder
 51 {
 52 public:
 53     FirstOrderBuilder()
 54     {
 55         m_Product = new Product;
 56     }
 57
 58     ~FirstOrderBuilder()
 59     {
 60         cout << "~FirstOrderBuilder()" << endl;
 61         delete m_Product;
 62         m_Product = NULL;
 63     }
 64
 65     void setOrderPart1()
 66     {
 67         m_Product->setPart1("first part1");
 68     }
 69
 70     void setOrderPart2()
 71     {
 72         m_Product->setPart2("first part2");
 73     }
 74
 75     Product* getProduct()
 76     {
 77         return m_Product;
 78     }
 79
 80 private:
 81     Product* m_Product;
 82 };
 83
 84 //具体的建造类
 85 class SecondOrderBuilder : public OrderBuilder
 86 {
 87 public:
 88     SecondOrderBuilder()
 89     {
 90         m_Product = new Product;
 91     }
 92
 93     ~SecondOrderBuilder()
 94     {
 95         cout << "~SecondOrderBuilder()" << endl;
 96         delete m_Product;
 97         m_Product = NULL;
 98     }
 99
100     void setOrderPart1()
101     {
102         m_Product->setPart1("second part1");
103     }
104
105     void setOrderPart2()
106     {
107         m_Product->setPart2("second part2");
108     }
109
110     Product* getProduct()
111     {
112         return m_Product;
113     }
114
115 private:
116     Product* m_Product;
117 };
118
119 //Director类,负责管理实例创建的依赖关系,指挥构建者类创建实例
120 class Director
121 {
122 public:
123     Director(OrderBuilder* builder) : m_pOrderBuilder(builder)
124     {
125     }
126     void construct()
127     {
128         m_pOrderBuilder->setOrderPart1();
129         m_pOrderBuilder->setOrderPart2();
130     }
131
132 private:
133     OrderBuilder* m_pOrderBuilder;
134 };
135
136
137 int main()
138 {
139     OrderBuilder* mBuilder = new SecondOrderBuilder;
140     Director* director = new Director(mBuilder);
141     director->construct();
142     Product* order = mBuilder->getProduct();
143     order->getPart1();
144     order->getPart2();
145
146     delete director;
147     director = NULL;
148
149     delete mBuilder;
150     mBuilder = NULL;
151
152 return 0;
153 }
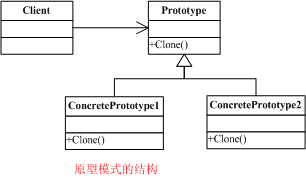
4.原型模式:
4.1 定义
用原型实例指定创建对象的种类,并且通过复制这些原型创建新的对象。
4.2 特点
■ 性能优良:原型模式是在内存二进制流的复制,要比直接new一个对象性能好,特别是在一个循环体内产生大量的对象时,原型模式可以更好地体现其优点。
■逃避构造函数的约束:这既是优点也是缺点,直接在内存中复制,构造函数是不会执行的,因此减少了约束,需要在实际应用时进行权衡考虑。
4.3 使用场景
■ 资源优化场景,类初始化需要消化非常多的资源,这个资源包括数据、硬件资源等。
■ 性能和安全要求的场景,通过new产生一个对象需要非常烦琐的数据准备或访问权限,可以使用原型模式。
■ 一个对象多个修改者的场景,一个对象需要提供给其他对象访问,而且各个调用者可能都需要修改其值时,可以考虑使用原型模式复制多个对象供调用者使用。
4.4 c++源码例程
 1 #include <iostream>
 2 using namespace std;
 3 //具体的实现类
 4 class Product
 5 {
 6 public:
 7     Product(int id, string name):m_id(id),m_name(name)
 8     {
 9         cout << "Product() id address:" << &m_id << endl;
10         cout << "Product() name address:" << &m_name << endl;
11     }
12
13     //关键代码拷贝构造函数
14     Product(const Product& obj)
15     {
16         this->m_id = obj.m_id;
17         this->m_name = obj.m_name;
18         cout << "Product(const Product& obj) id address:" << &m_id << endl;
19         cout << "Product(const Product& obj) name address:" << &m_name << endl;
20     }
21     //关键代码克隆函数,返回return new Sheep(*this)
22     Product* clone()
23     {
24         return new Product(*this);
25     }
26     void show()
27     {
28         cout << "id  :" << m_id << endl;
29         cout << "name:" << m_name.data() << endl;
30     }
31 private:
32     int m_id;
33     string m_name;
34 };
35 int main()
36 {
37     Product* s1 = new Product(1, "abs");
38     s1->show();
39     Product* s2 = s1->clone();
40     s2->show();
41
42     delete s1;
43     s1 = NULL;
44     delete s2;
45     s2 = NULL;
46     return 0;
47 }
5. Singleton(单例)
5.1 定义
确保一个类只有一个实例,而且自行实例化并向整个系统提供这个实例
5.2 应用
单例模式的主要作用是确保一个类只有一个实例存在。单例模式可以用在建立目录、数据库连接等需要单线程操作的场合,用于实现对系统资源的控制。
5.3 懒汉单例模式
5.3.1 定义
第一次引用类时,才进行对象实例化。
5.3.2 c++源码例程
非线程安全的懒汉单例模式
1 class Singleton 2 { 3 public: 4 static Singleton* getInstance(); 5 ~Singleton(){} 6 7 private: 8 Singleton(){} //构造函数私有,防止通过拷贝构造,赋值运算实例化对象 9 Singleton(const Singleton& obj) = delete; //明确拒绝 10 Singleton& operator=(const Singleton& obj) = delete; //明确拒绝 11 12 static Singleton* m_pSingleton; 13 }; 14 15 Singleton* Singleton::m_pSingleton = NULL; 16 17 Singleton* Singleton::getInstance() 18 { 19 if(m_pSingleton == NULL) 20 { 21 m_pSingleton = new Singleton; 22 } 23 return m_pSingleton; 24 }
线程安全的懒汉单例模式
 1 std::mutex mt;
 2
 3 class Singleton
 4 {
 5 public:
 6     static Singleton* getInstance();
 7 private:
 8     Singleton(){}                                    //构造函数私有
 9     Singleton(const Singleton&) = delete;            //明确拒绝
10     Singleton& operator=(const Singleton&) = delete; //明确拒绝
11
12     static Singleton* m_pSingleton;
13
14 };
15 Singleton* Singleton::m_pSingleton = NULL;
16
17 Singleton* Singleton::getInstance()
18 {
19     if(m_pSingleton == NULL)
20     {
21         mt.lock();
22         if(m_pSingleton == NULL)
23         {
24             m_pSingleton = new Singleton();
25         }
26         mt.unlock();
27     }
28     return m_pSingleton;
29 }
5.4 饿汉单例模式
5.4.1 定义
类加载时,就进行对象实例化
1 //饿汉式:线程安全,注意一定要在合适的地方去delete它 2 class Singleton 3 { 4 public: 5 static Singleton* getInstance(); 6 private: 7 Singleton(){} //构造函数私有 8 Singleton(const Singleton&) = delete; //明确拒绝 9 Singleton& operator=(const Singleton&) = delete; //明确拒绝 10 11 static Singleton* m_pSingleton; 12 }; 13 14 Singleton* Singleton::m_pSingleton = new Singleton(); 15 16 Singleton* Singleton::getInstance() 17 { 18 return m_pSingleton; 19 }
二、结构型
6. Adapter Class/Object(适配器)
结构型模式(Structural Pattern)描述如何将类或者对象结合在一起形成更大的结构。结构型模式的目的是通过组合类或对象产生更大结构以适应更高层次的逻辑需求,
6.1 定义
将一个类的接口变换成客户端所期待的另一种接口,从而使原本因接口不匹配而无法在一起工作的两个类能够在一起工作。
6.2 优点
■ 适配器模式可以让两个没有任何关系的类在一起运行。
■ 增加了类的透明性。
■ 提高类的复用度。
■ 增强代码的灵活性。
适配器模式的使用场景使用适配器的典型场景:修改一个已经投产中的系统时,需要对系统进行扩展,此时使用一个已有的类,但这个类不符合系统中的接口,这时使用适配器模式是最合适的,它可以将不符合系统接口的类进行转换,转换成符合系统接口的、可以使用的类。
6.3 c++源码例程
 1 #include<iostream>
 2 using namespace std;
 3 //源角色
 4 class ShuiJiao{
 5 public:
 6     void makeShuiJiao(){
 7         cout<<"调制菜料"<<endl;
 8         cout<<"擀面皮"<<endl;
 9         cout<<"包饺子"<<endl;
10     }
11 };
12 //抽象目标类
13 class HumDun{
14 public:
15     virtual void makeHumDun()=0;
16 };
17 //适配类
18 class FoodAdapter:public HumDun,public ShuiJiao{
19 public:
20     void makeHumDun(){
21         makeShuiJiao();
22         cout<<"水饺与馄饨步骤一样"<<endl;
23     }
24 };
25 int main(){
26     FoodAdapter foodAdapter;
27     foodAdapter.makeShuiJiao();
28     foodAdapter.makeHumDun();
29
30 }
7. Bridge(桥接)
7.1 定义
将抽象和实现解耦,使得两者可以独立地变化
7.2 优点
■ 抽象和实现分离是桥梁模式的主要特点,是为了解决继承的缺点而提出的设计模式。在该模式下,实现可以不受抽象的约束,不用绑定在一个固定的抽象层次上。
■ 实现对客户透明,客户端不用关心细节的实现,它已经由抽象层通过聚合关系完成了封装。
■ 提高灵活性和扩展性。
7.3 桥梁模式的使用场合
■ 如果一个系统需要在构件的抽象化角色和具体化角色之间增加更多的灵活性,避免在两个层次之间建立静态的联系。
■ 设计要求实现化角色的任何改变不应当影响客户端,或者说实现化角色的改变对客户端是完全透明的。
■ 一个构件有多于一个的抽象化角色和实现化角色,系统需要它们之间进行动态耦合。
7.4 c++源码实例
 1 #include<iostream>
 2 using namespace std;
 3
 4 //抽象颜色类
 5 class Color{
 6 public:
 7     virtual string getColor() = 0;
 8 };
 9
10 //抽象形状类
11 class AbstractShape{
12 public:
13     virtual void draw(Color* color) = 0;
14 };
15
16 //具体形状类
17 class Circle:public AbstractShape{
18     void draw(Color* color){
19         cout<<"draw a "+ color->getColor()  +" Circle"<<endl;
20     }
21 };
22 //具体形状类
23 class Square:public AbstractShape{
24     void draw(Color* color){
25         cout<<"draw a "+ color->getColor() +" Square"<<endl;
26     }
27 };
28 //具体颜色类
29 class Red:public Color{
30      string getColor(){
31         return "red";
32     }
33 };
34 //具体颜色类
35 class Green:public Color{
36      string getColor(){
37         return "Green";
38     }
39 };
40
41 int main(){
42     Color* color = new Green();
43     AbstractShape* shape = new Square();
44     shape->draw(color);
45     delete color;
46     color = NULL;
47     delete shape;
48     shape = NULL;
49 }
8. Composite(组合)
8.1定义
将对象组合成树形结构以表示“部分—整体”的层次结构,使得用户对单个对象和组合对象的使用具有一致性
8.2 优点
■ 高层模块调用简单。一棵树形机构中的所有节点都是 Component,局部和整体对调用者来说没有任何区别,即高层模块不必关心自己处理的是单个对象还是整个组合结构,简化了高层模块的代码。
■ 节点自由增加。使用组合模式后,如果想增加一个树枝节点、树叶节点只需要找到其父节点即可。
8.3 缺点
■ 不易控制树枝构件的类型;
■ 不易使用继承的方法来增加新的行为。
8.4 使用场景
■ 需要描述对象的部分和整体的等级结构,如树形菜单、文件和文件夹管理。
■ 需要客户端忽略个体构件和组合构件的区别,平等对待所有的构件。组合模式也是应用广泛的一种设计模式。
8.5 c++源码实例
  1 #include<iostream>
  2 #include <list>
  3 #include <memory>
  4 #include <stdio.h>
  5 #include <string>
  6 using namespace std;
  7
  8 //
  9 class Company {
 10 public:
 11     virtual string getInfo() = 0;
 12     virtual  string getName()
 13     {
 14         return name;
 15     }
 16     virtual string getType() = 0;
 17 protected:
 18     string name;
 19     string position;
 20     int salary;
 21 };
 22 class ConcreteCompany :public Company {
 23 public:
 24     ConcreteCompany(string name, string position, int salary) {
 25         this->name = name;
 26         this->position = position;
 27         this->salary = salary;
 28     }
 29     void add(Company* company) {
 30
 31         shared_ptr<Company> temp(company);
 32         companyList.push_back(temp);
 33     }
 34     string getType() {
 35         return "ConcreteCompany";
 36     }
 37     void remove(string companyName) {
 38         list<shared_ptr<Company>>::iterator iter = companyList.begin();
 39             for (; iter != companyList.end(); iter++)
 40             {
 41                     if ((*iter).get()->getName() == companyName)
 42                     {
 43                         companyList.erase(iter);
 44                         return;
 45                     }
 46             }
 47     }
 48     list<shared_ptr<Company>> getChild() {
 49         return companyList;
 50     }
 51     string getInfo() {
 52         string info = "";
 53         info = "名称:" + this->name;
 54         info = info + "\t职位:" + this->position;
 55         info = info + "\t薪水:" + to_string(this->salary);
 56         return info;
 57     }
 58 private:
 59     list<shared_ptr<Company>> companyList;
 60 };
 61
 62 class Employee :public Company {
 63 public:
 64     Employee(string name, string position, int salary) {
 65         this->name = name;
 66         this->position = position;
 67         this->salary = salary;
 68     }
 69     string getType() {
 70         return "Employee";
 71     }
 72     string getInfo() {
 73         string info = "";
 74         info = "名称:" + this->name;
 75         info = info + "\t职位:" + this->position;
 76         info = info + "\t薪水:" + to_string(this->salary);
 77         return info;
 78     }
 79 };
 80 void disPlay(ConcreteCompany* root) {
 81
 82     cout << root->getInfo() << endl;
 83     list<shared_ptr<Company>> tmp = root->getChild();
 84     list<shared_ptr<Company>>::iterator iter = tmp.begin();
 85     for (; iter != tmp.end(); iter++)
 86     {
 87         if ((*iter).get()->getType() == string("Employee"))
 88         {
 89             cout << (*iter).get()->getInfo() << endl;
 90         }
 91         else {
 92             disPlay((ConcreteCompany*)(*iter).get());
 93         }
 94     }
 95
 96 }
 97 int main() {
 98     ConcreteCompany* root = new ConcreteCompany("张三", "CEO", 100000);
 99     ConcreteCompany* develop = new ConcreteCompany("李四", "研发组长", 100000);
100     ConcreteCompany* sale = new ConcreteCompany("王二", "销售组长", 100000);
101     Employee *e1 = new Employee("A", "研发",200);
102     Employee *e2 = new Employee("B", "销售", 200);
103     Employee *e3 = new Employee("C", "研发", 200);
104     Employee *e4 = new Employee("D", "销售", 200);
105     root->add(develop);
106     root->add(sale);
107     develop->add(e1);
108     develop->add(e3);
109     sale->add(e2);
110     sale->add(e4);
111     disPlay(root);
112     develop->remove("A");
113     disPlay(root);
114     delete root;
115     root = NULL;
116
117 }
9. Decorator(装饰)
9.1定义
动态地给一个对象添加一些额外的职责。就增加功能来说,装饰模式比生成子类更为灵活。
9.2.优点
■ 装饰类和被装饰类可以独立发展,而不会相互耦合。即 Component 类无须知道Decorator类,Decorator类是从外部来扩展Component类的功能,而Decorator也不用知道具体的构件。
■ 装饰模式是继承关系的一个替代方案。装饰类Decorator,不管装饰多少层,返回的对象还是Component。、
■ 装饰模式可以动态地扩展一个实现类的功能。
9.3 缺点
多层的装饰是比较复杂的。
9.4 使用场景
■ 需要扩展一个类的功能,或给一个类增加附加功能。
■ 需要动态地给一个对象增加功能,这些功能可以再动态地撤销。
■ 需要为一批类进行改装或加装功能。装饰模式是对继承的有力补充。单纯使用继承时,在一些情况下就会增加很多子类,而且灵活性差,维护也不容易。装饰模式可以替代继承,解决类膨胀的问题
 1 #include<iostream>
 2 using namespace std;
 3 //抽象装饰对象
 4 class Car{
 5 public:
 6     virtual void show() = 0;
 7 };
 8
 9 //具体装饰对象
10 class Benz:public Car{
11     void show(){
12         cout<<"奔驰车默认为黑色"<<endl;
13     }
14 };
15
16 //装饰角色:该角色持有一个构件对象的实例,并定义一个与抽象构件接口一致的接口。
17 class CarDecorator:public Car{
18 public:
19     CarDecorator(Car* car){
20         this->car = car;
21     }
22     void show(){
23         this->car->show();
24     }
25 private:
26     Car* car;
27 };
28 //具体装饰角色:该角色负责对构件对象进行装饰。
29 class ConcreteCarDecorator:public CarDecorator{
30 public:
31         ConcreteCarDecorator(Car* car):CarDecorator(car){}
32         void show(){
33                 CarDecorator::show();
34                 print();
35                 setGps();
36         }
37 private:
38     void print(){
39         cout<<"绘制字样"<<endl;
40     }
41     void setGps(){
42         cout<<"安装GPS"<<endl;
43     }
44 };
45 int main(){
46     Car* car = new Benz();
47     CarDecorator* cd = new ConcreteCarDecorator(car);
48     cd->show();
49     delete cd;
50     cd = NULL;
51     delete car;
52     car = NULL;
53 }
10. Facade(外观)
10.1定义
要求一个子系统的外部与其内部的通信必须通过一个统一的对象进行。外观模式提供一个高层次的接口,使得子系统更易使用。
10.2 优点
■ 减少系统的相互依赖,所有的依赖都是对Façade对象的依赖,与子系统无关。
■ 提高灵活性,不管子系统内部如何变化,只要不影响Facade对象,任何活动都是自由的。
■ 提高安全性,Facade中未提供的方法,外界就无法访问,提高系统的安全性。
注意外观模式最大的缺点是不符合开闭原则,对修改关闭,对扩展开放。
10.3 场景使用
■ 为一个复杂的模块或子系统提供一个供外界访问的接口。
■ 子系统相对独立,外界对子系统的访问只要黑箱操作即可。
■ 预防风险扩散,使用Façade进行访问操作控制。
 1 #include<iostream>
 2 using namespace std;
 3 class Airport{
 4 public:
 5     void bookTicket(string from,string to){
 6         cout<<"订购了从"+ from +"到" + to + "的机票"<<endl;
 7     }
 8 };
 9 class Hotel{
10 public:
11     void reserve(int days){
12         cout<<"定了"<<days<<"天的房间"<<endl;
13     }
14 };
15 class Chauffeur{
16 public:
17     void drive(string to){
18         cout<<"司机开车去"+to<<endl;
19
20     }
21 };
22 class Secretary{
23 public:
24     void trip(string to,int days){
25         airport.bookTicket("上海",to);
26         chauffeur.drive("机场");
27         hotel.reserve(days);
28     }
29 private:
30     Chauffeur chauffeur;
31     Hotel hotel;
32     Airport airport;
33 };
34 int main(){
35     Secretary s;
36     cout<<"老板告诉秘书出差10天"<<endl;
37     s.trip("青岛",10);
38 }
11. Flyweight(享元)
11.1定义
使用共享对象可有效地支持大量的细粒度的对象。享元模式是以共享的方式高效地支持大量的细粒度对象。享元对象能做到共享的关键是区分内部状态(Internal State)和外部状态(External State)。
■ 内部状态是存储在享元对象内部的、可以共享的信息,并且不会随环境改变而改变。
■ 外部状态是随环境改变而改变且不可以共享的状态。享元对象的外部状态必须由客户端保存,并在享元对象被创建之后,在需要使用的时候再传入到享元对象内部。
11.2. 享元模式的优缺点
享元模式的优点在于大幅减少内存中对象的数量,降低程序内存的占用,提高性能。
但是,相应付出的代价也很高。
■ 享元模式增加了系统的复杂性,需要分出外部状态和内部状态,而且内部状态具有固化特性,不应该随外部状态改变而改变,这使得程序的逻辑复杂化。
■ 享元模式将享元对象的状态外部化,而读取外部状态使得运行时间变长。
11.3. 享元模式的使用场景。
■ 系统中有大量的相似对象,这些对象耗费大量的内存。
■ 细粒度的对象都具备较接近的外部状态,而且内部状态与环境无关,即对象没有特定身份。
■ 需要缓冲池的场景。
 1 #include<iostream>
 2 using namespace std;
 3
 4 //棋子接口Chesspiece是抽象享元,该接口中规范一个落子put()方法,对棋子的坐标进行定位通过参数的形式将外部状态传入
 5 class  Chesspiece{
 6 public:
 7     virtual void put(int x,int y)=0;
 8 };
 9
10 //棋子具体享元ChesspieceFlyweight实现棋子接口Chesspiece
11 class ChesspieceFlyweight:public Chesspiece{
12 public:
13     ChesspieceFlyweight(string color){
14         this->color = color;
15     }
16     void put(int x,int y){
17         cout<<color<<"子在("<<x<<","<<y<<")落子"<<endl;
18     }
19 private:
20     string color;
21 };
22 //棋子工厂ChesspieceFactory是享元工厂,负责创建和管理棋子
23 class ChesspieceFactory{
24 public:
25     static  Chesspiece* WHITE;
26     static  Chesspiece* BLACK;
27 public:
28     static Chesspiece* getChessPiece(string color){
29         if(color == "白"){
30             return WHITE;
31         }
32         else if(color == "黑"){
33             return BLACK;
34         }
35         return NULL;
36     }
37
38 };
39 Chesspiece* ChesspieceFactory::BLACK = new ChesspieceFlyweight("黑");
40 Chesspiece* ChesspieceFactory::WHITE = new ChesspieceFlyweight("白");
41 int main(){
42     ChesspieceFactory chesspieceFactory;
43     Chesspiece* p1 = chesspieceFactory.getChessPiece("黑");
44     p1->put(1,1);
45     Chesspiece* p2 = chesspieceFactory.getChessPiece("白");
46     p2->put(1,1);
47     delete p1;
48     p1 = NULL;
49     delete p2;
50     p2 = NULL;
51 }
12. Proxy(代理)
12.1 定义
为其他对象提供一种代理以控制对这个对象的访问
按照使用目的可以将代理划分为以下几种。
■ 远程(Remote)代理:为一个位于不同的地址空间的对象提供一个局部代表对象。这个不同的地址空间可以是在本机器中,也可以在另一台机器中。
■ 虚拟(Virtual)代理:有时需要创建一些消耗较多资源的对象,可以首先创建代理对象,而将真实对象的创建延迟。例如,加载一个很大的图片,可以通过图片的代理来代替真正的图片。
■ 保护(Protect or Access)代理:控制对一个对象的访问,如果需要,可以给不同的用户提供不同级别的使用权限。
■ 缓存(Cache)代理:为某一个目标操作的结果提供临时的存储空间,以便多个客户端可以共享这些结果。
■ 同步(Synchronization)代理:使几个用户能够同时使用一个对象而没有冲突。
■ 智能引用(Smart Reference)代理:当一个对象被引用时,提供一些额外的操作,例如,记录访问的流量和次数等。
12.2 代理模式的优点
■ 职责清晰:真实的角色实现实际的业务逻辑,不用关心其他非本职的事务,通过后期的代理完成附加的事务,附带的结果就是编程简洁清晰。
■ 高扩展性:具体主题角色随需求不同可能有很多种,但只要实现了接口,代理类就完全可以在不做任何修改的情况下代理各种真实主题角色。
■ 智能化:代理类可以在运行时才确定需要去代理的真实主题,这是一种强大的功能。
 1 #include<iostream>
 2 using namespace std;
 3 //IGamePlayer接口对游戏玩家进行抽象
 4 class IGamePlayer{
 5 public:
 6     virtual void killBoss() = 0;//杀怪
 7     virtual void upGrade() = 0;//升级
 8 };
 9 //GamePlayer实现IGamePlayer接口中的方法
10 class GamePlayer:public IGamePlayer{
11 public:
12     GamePlayer(string name){
13         m_name = name;
14     }
15     void killBoss(){
16         cout<<m_name<<"在打怪"<<endl;
17     }
18     void upGrade(){
19         cout<<m_name<<"成功升级"<<endl;
20     }
21 private:
22     string m_name;
23 };
24 //GamePlayerProxy是代理类
25 class GamePlayerProxy:public IGamePlayer{
26 public:
27     GamePlayerProxy(IGamePlayer* player){
28         this->player = player;
29     }
30     void killBoss(){
31         this->log();
32         player->killBoss();
33     }
34     void upGrade(){
35         player->upGrade();
36         this->count();
37     }
38 private:
39     IGamePlayer* player = NULL;
40     void log(){
41         cout<<"打怪时间XXX"<<endl;
42     }
43     void count(){
44         cout<<"升一级耗费5小时"<<endl;
45     }
46 };
47 int main(){
48     IGamePlayer* player = new GamePlayer("AA");
49     IGamePlayer* prox = new GamePlayerProxy(player);
50     prox->killBoss();
51     prox->upGrade();
52     delete  player;
53     player = NULL;
54     delete  prox;
55     prox = NULL;
56
57 }
三、行为型
13. Interpreter(解释器)
13.1定义
给定一门语言,定义它的文法的一种表示,并定义一个解释器,该解释器使用该表示来解释语言中的句子
13.2 优点
■ 简单的语法分析工具。
■ 扩展性,修改语法规则只要修改相应的非终结符表达式即可,若扩展语法,则只要增加非终结符类即可。
13.3 缺点
■ 解释器模式会引起类膨胀。每个语法都要产生一个非终结符表达式,语法比较复杂时就可能产生大量的类文件,不易维护。
■ 采用递归调用方法。每个非终结符表达式只关心与自己有关的表达式,每个表达式需要知道最终的结果,必须一层一层地剥茧,无论是面向过程的语言还是面向对象的语言,递归都是在必要条件下使用的,不易调试且影响效率。
13.4. 使用场景
■ 重复发生的问题可以使用解释器模式。例如,多个应用服务器,每天产生大量的日志,需要对日志文件进行分析处理,由于各个服务器的日志格式不同,但是数据要素是相同的,按照解释器的说法就是终结符表达式都是相同的,非终结符表达式就需要制定。
■ 一个简单语法需要解释的场景。
13.5 c++源码例程
 1 #include<iostream>
 2 #include<string>
 3 using namespace std;
 4 //抽象表达式
 5 class Expression {
 6 public:
 7   virtual bool interpret(string context) = 0;
 8 };
 9
10 //终结符表达式
11 class TerminalExpression:public Expression {
12 private:
13     string m_data;
14 public:
15     TerminalExpression(string data){
16       this->m_data = data;
17        }
18
19     bool interpret(string context) {
20       if(context.find(m_data)!= string::npos){
21          return true;
22       }
23       return false;
24    }
25 };
26 //非终结符表达式
27 class OrExpression:public Expression {
28 private:
29     Expression* expr1 = NULL;
30     Expression* expr2 = NULL;
31
32 public:
33     OrExpression(Expression* expr1, Expression* expr2) {
34       this->expr1 = expr1;
35       this->expr2 = expr2;
36        }
37
38     bool interpret(string context) {
39       return expr1->interpret(context) || expr2->interpret(context);
40    }
41 };
42 //非终结符表达式
43 class AndExpression:public Expression {
44 private:
45     Expression* expr1 = NULL;
46     Expression* expr2 = NULL;
47
48 public:
49     AndExpression(Expression* expr1, Expression* expr2) {
50       this->expr1 = expr1;
51       this->expr2 = expr2;
52    }
53     bool interpret(string context) {
54       return expr1->interpret(context) && expr2->interpret(context);
55    }
56 };
14. Template Method(模板方法)
14.1 定义
定义一个操作中的算法的框架,而将一些步骤延迟到子类中。使得子类可以不改变一个算法的结构即可重定义该算法的某些特定步骤。
14.2 优点
■ 封装不变的部分,扩展可变部分。不变的部分封装到父类中实现,而可变的部分则可以通过继承进行扩展。
■ 提取公共部分代码,便于维护。将公共部分的代码抽取出来放在父类中,维护时只需要修改父类中的代码。
■ 行为由父类控制,子类实现。模板方法模式中的基本方法是由子类实现的,因此子类可以通过扩展增加相应的功能,符合开闭原则。
14.3 场景使用
■ 多个子类有公共方法,并且逻辑基本相同时。
■ 可以把重要的、复杂的、核心算法设计为模板方法,周边的相关细节功能则由各个子类实现。■ 重构时,模板方法模式是一个经常使用的模式,将相同的代码抽取到父类中。
14.4 源码例程
 1 #include<iostream>
 2 using namespace std;
 3 //抽象模板
 4 class Account{
 5 private:
 6     string m_accountNumber;
 7 public:
 8     Account(){
 9
10      }
11      Account(string number){
12          m_accountNumber = number;
13      }
14     double calculateAmount(string accountType,string m_accountNumber){
15              return 67676.0D;
16     }
17     //模板方法,获取账号利息
18      double calculateInterest(){
19         string accountType = getAccountType();
20         double interestRate = getInterestRate();
21         double amount = calculateAmount(accountType,m_accountNumber);
22         return amount*interestRate;
23      }
24 protected:
25     virtual string getAccountType() = 0;
26     virtual double getInterestRate() = 0;
27 };
28 //具体模板
29 class DemandAccount:public Account{
30 protected:
31     string getAccountType(){
32         return "活期";
33     }
34     double getInterestRate(){
35         return 0.005D;
36     }
37 };
38 //具体模板
39 class FixedAccount:public Account{
40 protected:
41     string getAccountType(){
42         return "定期";
43     }
44     double getInterestRate(){
45         return 0.025D;
46     }
47 };
15. Chain of Responsibility(责任链)
15.1 定义
使多个对象都有机会处理请求,从而避免了请求的发送者和接收者之间的耦合关系。将这些对象连成一条链,并沿着这条链传递该请求,直到有对象处理它为止。
15.2 优点
■ 责任链模式将请求和处理分开,请求者不知道是谁处理的,处理者可以不用知道请求的全貌。
■ 提高系统的灵活性。
15.3 缺点
■ 降低程序的性能,每个请求都是从链头遍历到链尾,当链比较长的时候,性能会大幅下降。
■ 不易于调试,由于采用了类似递归的方式,调试的时候逻辑比较复杂。注意责任链中的节点数量需要控制,避免出现超长链的情况,这就需要设置一个最大的节点数量,超过则不允许增加节点,避免无意识地破坏系统性能。
15.3. 应用场景
■ 一个请求需要一系列的处理工作。
■ 业务流的处理,例如,文件审批。
■ 对系统进行补充扩展。
15.4 c++源码例程
 1 #include<iostream>
 2 using namespace std;
 3 class Player{
 4 private:
 5     Player* successor = NULL;
 6 public:
 7     virtual void handle(int i) = 0;
 8     void setSuccessor(Player* Successor){
 9         this->successor = Successor;
10     }
11     void next(int index){
12         if(successor != NULL){
13             successor->handle(index);
14         }else{
15             cout<<"游戏结束"<<endl;
16         }
17     }
18 };
19 class PlayerA:public Player{
20 public:
21     PlayerA(Player* successor){
22         this->setSuccessor(successor);
23     }
24     void handle(int i){
25         if(i==1){
26             cout<<"PlayerA 喝酒"<<endl;
27         }else{
28             cout<<"PlayerA 向下传"<<endl;
29             next(i);
30         }
31     }
32 };
33 class PlayerB:public Player{
34 public:
35     PlayerB(Player* successor){
36         this->setSuccessor(successor);
37     }
38     void handle(int i){
39         if(i==2){
40             cout<<"PlayerB 喝酒"<<endl;
41         }else{
42             cout<<"PlayerB 向下传"<<endl;
43             next(i);
44         }
45     }
46 };
47
48
49 int main(){
50     Player* play = new PlayerA(new PlayerB(NULL));
51     play->handle(2);
52     delete play;
53     play = NULL;
54 }
16. Command(命令)
16.1 定义
将一个请求封装成一个对象,从而让你使用不同的请求把客户端参数化,对请求排队或者记录请求日志,可以提供命令的撤销和恢复功能。
16.2.优点
■ 类间解耦。调用者角色与接收者角色之间没有任何依赖关系,调用者实现功能时只需要调用Command中的execute()方法即可,不需要了解是哪个接收者执行。
■ 可扩展性。Command 的子类可以非常容易地扩展,而调用者Invoker和高层次的模块Client不产生严重的代码耦合。
■ 命令模式结合其他模式会更优秀。命令模式可以结合责任链模式,实现命令族解析任务,结合模板方法模式,则可以减少Command子类的膨胀问题。
16.3 缺点
■ 使用命令模式可能会导致系统中出现过多的具体命令类,因此需要在项目中慎重考虑使用。
16.4 应用场景
■ 使用命令模式作为“回调”在面向对象系统中的替代。“回调”讲的便是将一个函数登记上,然后在以后调用此函数。
■ 需要在不同的时间指定请求、将请求排队。
■ 系统需要支持命令的撤销(undo)。命令对象可以把状态存储起来,等到客户端需要撤销时,可以调用undo()方法,将命令所产生的效果撤销。
■ 需要将系统中所有的数据更新操作保存到日志里,以便在系统崩溃时,可以根据日志读回所有的数据更新命令,重新调用 execute()方法一条一条执行这些命令,从而恢复系统在崩溃前所做的数据更新。
■ 一个系统需要支持交易(transaction)。一个交易结构封装了一组数据更新命令。使用命令模式来实现交易结构可以使系统增加新的交易类型
 1 #include<iostream>
 2 #include<list>
 3 using namespace std;
 4 class Order{
 5 public:
 6     virtual void execute() = 0;
 7 };
 8 class Stock{
 9 private:
10     string name = "ABC";
11     int quantity = 10;
12 public:
13     void buy(){
14         cout<<"Stock [ Name: "+name+" Quantity: " << quantity <<" ] bought"<<endl;
15     }
16     void sell(){
17         cout<<"Stock [ Name: "+name+" Quantity: " << quantity <<" ] sold"<<endl;
18     }
19 };
20 class BuyStock:public Order{
21 private:
22     Stock abcStock;
23 public:
24     BuyStock(Stock abcStock){
25       this->abcStock = abcStock;
26     }
27      void execute() {
28       abcStock.buy();
29    }
30 };
31 class SellStock:public Order {
32 private:
33     Stock abcStock;
34
35 public:
36     SellStock(Stock abcStock){
37       this->abcStock = abcStock;
38     }
39
40    void execute() {
41       abcStock.sell();
42    }
43 };
44
45 class Broker {
46 private:
47     list<Order*> orderList;
48 public:
49     void takeOrder(Order* order){
50       orderList.push_back(order);
51    }
52
53     void placeOrders(){
54     list<Order*>::iterator iter = orderList.begin();
55        for (; iter != orderList.end(); iter++){
56          (*iter)->execute();
57          delete (*iter);
58      }
59       orderList.clear();
60    }
61 };
62
63 int main(){
64     Stock abcStock;
65     Order* buyStockOrder = new BuyStock(abcStock);
66     Order* sellStockOrder = new SellStock(abcStock);
67     Broker broker;
68     broker.takeOrder(buyStockOrder);
69      broker.takeOrder(sellStockOrder);
70      broker.placeOrders();
71      delete buyStockOrder;
72      buyStockOrder = NULL;
73      delete sellStockOrder;
74      sellStockOrder = NULL;
75 }
17. Iterator(迭代器)
17.1 定义
提供一种方法访问一个容器对象中各个元素,而又不需暴露该对象的内部细节
17.2 优点
■它支持以不同的方式遍历一个聚合对象。
■迭代器简化了聚合类。
■在同一个聚合上可以有多个遍历。
■在迭代器模式中,增加新的聚合类和迭代器类都很方便,无须修改原有代码。
17.3 缺点
■由于迭代器模式将存储数据和遍历数据的职责分离,增加新的聚合类需要对应增加新的迭代器类,类的个数成对增加,这在一定程度上增加了系统的复杂性。
17.4 使用场景
■访问一个聚合对象的内容而无须暴露它的内部表示。
■需要为聚合对象提供多种遍历方式。
■为遍历不同的聚合结构提供一个统一的接口。
17.5 c++源码实例
  1 #include <iostream>
  2 #include <string>
  3 #include <vector>
  4 using namespace std;
  5
  6 //抽象迭代角色:该角色负责定义访问和遍历元素的接口。
  7 class Iterator
  8 {
  9 public:
 10     Iterator(){}
 11     virtual ~Iterator(){};
 12     virtual string First() = 0;
 13     virtual string Next() = 0;
 14     virtual string GetCur() = 0;
 15     virtual bool IsEnd() = 0;
 16 };
 17
 18 //抽象聚合角色:该角色提供创建迭代器角色的接口。
 19 class Aggregate
 20 {
 21 public:
 22     virtual int Count() = 0;
 23     virtual void Push(const string &strValue) = 0;
 24     virtual string POp(const int cnt) = 0;
 25 };
 26
 27 //具体迭代角色:该角色实现Iterator接口,完成容器元素的遍历。
 28 class ConcreteIterator : public Iterator
 29 {
 30 public:
 31     ConcreteIterator(Aggregate *p_aggregate):m_aggregate(p_aggregate),m_cnt(0){}
 32
 33     string First()
 34     {
 35         return m_aggregate->POp(0);
 36     }
 37
 38     string Next()
 39     {
 40         string str;
 41         m_cnt++;
 42         if (m_cnt < m_aggregate->Count())
 43         {
 44             str = m_aggregate->POp(m_cnt);
 45         }
 46
 47         return str;
 48     }
 49
 50     string GetCur()
 51     {
 52         return m_aggregate->POp(m_cnt);
 53     }
 54
 55     bool IsEnd()
 56     {
 57         return m_cnt >= m_aggregate->Count() ? true : false;
 58     }
 59
 60     ~ConcreteIterator(){ }
 61
 62 private:
 63     Aggregate *m_aggregate;
 64     int m_cnt;
 65 };
 66
 67 //具体聚集角色:该角色实现抽象聚集接口,创建出容纳迭代器的对象
 68 class ConcreteAggregate : public Aggregate
 69 {
 70 public:
 71     ConcreteAggregate()
 72     {
 73         m_vecItem.clear();
 74     }
 75
 76     ~ConcreteAggregate()
 77     {
 78     }
 79
 80     int Count()
 81     {
 82         return m_vecItem.size();
 83     }
 84
 85     void Push(const string &strValue)
 86     {
 87         m_vecItem.push_back(strValue);
 88     }
 89
 90     string POp(const int cnt)
 91     {
 92         string str;
 93         if (cnt < Count())
 94         {
 95             str = m_vecItem[cnt];
 96         }
 97         return str;
 98     }
 99
100 private:
101     vector<string> m_vecItem;
102 };
103
104 int main()
105 {
106     ConcreteAggregate* pName = NULL;
107     pName = new ConcreteAggregate();
108     if (NULL != pName)
109     {
110         pName->Push("hello");
111         pName->Push("word");
112         pName->Push("cxue");
113     }
114
115     Iterator* iter = new ConcreteIterator(pName);
116
117     if (NULL != iter)
118     {
119         string strItem = iter->First();
120         while (!iter->IsEnd())
121         {
122             cout << iter->GetCur() << " is ok" << endl;
123             iter->Next();
124         }
125     }
126
127     delete iter;
128     iter = NULL;
129
130     system("pause");
131
132     return 0;
133 }
18. Mediator(中介者)
18.1 定义
用一个中介对象封装一系列对象(同事)的交互,中介者使各对象不需要显式地相互作用,从而使其耦合松散,而且可以独立地改变它们之间的交互。
18.2 优点
■ 减少类间的依赖,将原有的一对多的依赖变成一对一的依赖,使得对象之间的关系更易维护和理解。
■ 避免同事对象之间过度耦合,同事类只依赖于中介者,使同事类更易被复用,中介类和同事类可以相对独立地演化。
■ 中介者模式将对象的行为和协作抽象化,将对象在小尺度的行为上与其他对象的相互作用分开处理。
18.3 缺点
■ 中介者模式降低了同事对象的复杂性,但增加了中介者类的复杂性。
■ 中介者类经常充满了各个具体同事类的关系协调代码,这种代码是不能复用的。
18.4 c++源码实例
  1 #include <iostream>
  2 #include <string>
  3 using namespace std;
  4
  5 class HousePerson;
  6 class BuyHousePerson;
  7 class SellHousePerson;
  8
  9 //抽象中介类
 10 class Mediator{
 11 public:
 12     virtual void sendMessage(string msg, HousePerson *p) = 0;
 13 };
 14
 15 //抽象炒房客
 16 class HousePerson{
 17 public:
 18     HousePerson(Mediator *mediator)
 19     {
 20         m_mediator = mediator;
 21     }
 22 protected:
 23     Mediator *m_mediator;
 24 };
 25
 26 //买房的人
 27 class BuyHousePerson :public HousePerson
 28 {
 29 public:
 30     BuyHousePerson(Mediator *mediator) :HousePerson(mediator){}
 31     void sendMsg(string msg)
 32     {
 33         m_mediator->sendMessage(msg,this);
 34     }
 35     void notify(string msg)
 36     {
 37         cout << "买房者得到消息:" << msg << endl;
 38     }
 39 };
 40
 41 //卖房的人
 42 class SellHousePerson :public HousePerson
 43 {
 44 public:
 45     SellHousePerson(Mediator *mediator) :HousePerson(mediator){}
 46     void sendMsg(string msg)
 47     {
 48         m_mediator->sendMessage(msg, this);
 49     }
 50     void notify(string msg)
 51     {
 52         cout << "卖-房者得到消息:" << msg << endl;
 53     }
 54 };
 55
 56 //具体中介类
 57 class ConcreteMediator :public Mediator
 58 {
 59 public:
 60     void sendMessage(string msg, HousePerson *p)
 61     {
 62         if (p == bh)
 63         {
 64             sh->notify(msg);
 65         }
 66         else
 67         {
 68             bh->notify(msg);
 69         }
 70     }
 71
 72 public:
 73     BuyHousePerson *bh;
 74     SellHousePerson *sh;
 75 };
 76
 77 //客户端
 78 int main()
 79 {
 80     ConcreteMediator *pM = new ConcreteMediator;
 81     BuyHousePerson *pBh = new BuyHousePerson(pM);
 82     SellHousePerson* pSh = new SellHousePerson(pM);
 83
 84     pM->bh = pBh;
 85     pM->sh = pSh;
 86
 87     pBh->sendMsg("卖不卖,一口价780W");
 88     pSh->sendMsg("不卖,至少800W!");
 89
 90     if (pM)
 91     {
 92         delete pM;
 93         pM = nullptr;
 94     }
 95     if (pBh)
 96     {
 97         delete pBh;
 98         pBh = nullptr;
 99     }
100     if (pSh)
101     {
102         delete pSh;
103         pSh = nullptr;
104     }
105
106     return 0;
107 }
19. Memento(备忘录)
19.1 定义
不破坏封装性的前提下,捕获一个对象的内部状态,并在该对象之外保存这个状态。这样,以后就可以将该对象恢复到原先保存的状态。
19.2 使用场景
■ 需要保存和恢复数据的相关状态场景。
■ 提供一个可回滚的操作。
■ 需要监控副本的场景。例如,监控一个对象的属性,但是监控又不应该作为系统的主业务来调用,它只是边缘应用,即使出现监控不准、错误报警也影响不大,因此一般做法是备份一个主线程中的对象,然后由分析程序来分析。
■ 数据库连接的事务管理使用的就是备忘录模式
19.3 c++源码实例
 1 #include<iostream>
 2 #include<vector>
 3 using namespace std;
 4 class Backup{
 5 public:
 6     string content;//需要备份
 7     int version;//不需要备份
 8 public:
 9     Backup(string content){
10         this->content = content;
11     }
12 };
13 class Document{
14 public:
15     string content;
16     string otherContent;
17 public:
18     Backup* save(){
19         cout<<"保存备份"<<endl;
20         return new Backup(content);
21     }
22     void resume(Backup* backup){
23         cout<<"恢复备份"<<endl;
24         content = backup->content;
25     }
26     string toString(){
27         return "content:" + content + ",otherContent:" + otherContent;
28     }
29 };
30 class VersionControlSystem{
31 private:
32     vector<Backup*>backups;
33     int nextVersion = 0;
34 public:
35     void add(Backup* backup){
36         backup->version = ++nextVersion;
37         backups.push_back(backup);
38     }
39     Backup* get(int version){
40         for(int i=0;i<backups.size();i++){
41             if(backups[i]->version == version)
42             return backups[i];
43         }
44         return NULL;
45     }
46     Backup* getLastVersion(){
47         int len = backups.size();
48         if(len>0)
49             return backups[len-1];
50         else
51             return NULL;
52     }
53 };
54 int main(){
55     VersionControlSystem vcs;
56     Document document;
57     document.content = "content1";
58     document.otherContent = "otherContent1";
59     vcs.add(document.save());
60     cout<<document.toString()<<endl;
61     document.content = "content2";
62     document.otherContent = "otherContent2";
63     vcs.add(document.save());
64     cout<<document.toString()<<endl;
65
66     document.resume(vcs.get(1));
67     cout<<document.toString()<<endl;
68
69     document.resume(vcs.getLastVersion());
70     cout<<document.toString()<<endl;
71
72
73 }
20. Observer(观察者)
20.1 定义
定义对象间一种一对多的依赖关系,使得每当一个对象改变状态,则所有依赖于它的对象都会得到通知并被自动更新
20.2 优点
■ 观察者和被观察者之间是抽象耦合。被观察者角色所知道的只是一个具体观察者集合,每一个具体观察者都符合一个抽象观察者的接口。被观察者并不认识任何一个具体的观察者,它只知道它们都有一个共同的接口。由于被观察者和观察者没有紧密的耦合在一起,因此它们可以属于不同的抽象化层次,且都非常容易扩展。
■ 支持广播通信。被观察者会向所有登记过的观察者发出通知,这就是一个触发机制,形成一个触发链。
20.3 缺点
■ 如果一个主题有多个直接或间接的观察者,则通知所有的观察者会花费很多时间,且开发和调试都比较复杂。
■ 如果在主题之间有循环依赖,被观察者会触发它们之间进行循环调用,导致系统崩溃。在使用观察者模式时要特别注意这一点。
■ 如果对观察者的通知是通过另外的线程进行异步投递,系统必须保证投递的顺序执行。
■ 虽然观察者模式可以随时使观察者知道所观察的对象发生了变化,但是观察者模式没有提供相应的机制使观察者知道所观察的对象是如何发生变化。
20.4. 应用场景
■ 关联行为场景。
■ 事件多级触发场景
■ 跨系统的消息交换场景,如消息队列的处理机制
 1 #include<iostream>
 2 #include<vector>
 3 using namespace std;
 4 class Clickable;
 5 class ClickabkeObserver;
 6
 7 class  Clickable{
 8 public:
 9     virtual void click() = 0;
10     virtual void addClickableObserver(ClickabkeObserver* observer) = 0;
11     virtual void removeClickableObserver(ClickabkeObserver* observer) = 0;
12 };
13 class ClickabkeObserver{
14 public:
15     virtual void click(Clickable* clickable) = 0;
16 };
17 class Button:public Clickable{
18 public:
19     vector<ClickabkeObserver*>observers;
20     string color;
21     int x,y;
22     void click(){
23         cout<<"按钮被单击"<<endl;
24         for(int i=observers.size()-1;i>=0;i--){
25             observers[i]->click(this);
26         }
27     }
28     void addClickableObserver(ClickabkeObserver* observer){
29         observers.push_back(observer);
30     }
31     void removeClickableObserver(ClickabkeObserver* observer){
32
33     }
34 };
35 class ChangeCoordinateObserver:public ClickabkeObserver{
36 public:
37     void click(Clickable* clickable){
38         Button* b = (Button*)clickable;
39         b->x = 100;
40         b->y = 90;
41     }
42 };
43 class ChangeColorObserver:public ClickabkeObserver{
44 public:
45     void click(Clickable* clickable){
46         Button* b = (Button*)clickable;
47         b->color = "red";
48     }
49 };
50 class OtherObserver:public ClickabkeObserver{
51 public:
52     void click(Clickable* clickable){
53         cout<<"其他操作"<<endl;
54     }
55 };
56 int main(){
57     Button* button = new Button();
58     button->color = "blue";
59     button->x = 0;
60     button->y = 0;
61     button->addClickableObserver(new ChangeColorObserver());
62     button->addClickableObserver(new OtherObserver());
63     button->click();
64     cout<<"颜色:"<<button->color<<"坐标("<<button->x<<button->y<<")"<<endl;
65 }
21. State(状态)
21.1 定义
当一个对象内在状态改变时允许改变行为,这个对象看起来像改变了其类型。状态模式的核心是封装,状态的变更引起行为的变动,从外部看来就好像该对象对应的类发生改变一样
21.2 优点
■ 结构清晰。
■ 遵循设计原则。
■ 封装性非常好。
21.3 缺点
■ 子类太多,不易管理。
21.4 使用场景
■ 对象的行为依赖于它所处的状态,即行为随状态改变而改变的场景。
■ 对象在某个方法里依赖于一重或多重条件分支语句,此时可以使用状态模式将分支语句中的每一个分支都包装到一个单独的类中,使得这些条件分支语句能够以类的方式独立存在和演化。如此,维护这些独立的类就不再影响到系统的其他部分。
 1 #include<iostream>
 2 using namespace std;
 3 class Channel {
 4 public:
 5     virtual void display() = 0;
 6 };
 7 class CCTV1 :public Channel {
 8 public:
 9     void display() {
10         cout << "CCTV1" << endl;
11     }
12 };
13 class CCTV2 :public Channel {
14 public:
15     void display() {
16         cout << "CCTV2" << endl;
17     }
18 };
19 class TV {
20 public:
21     static Channel* cctv1;
22     static Channel* cctv2;
23 private:
24     Channel* channel;
25 public:
26     void setChannel(Channel* channel) {
27         this->channel = channel;
28     }
29     void disCCTV1() {
30         this->setChannel(cctv1);
31         this->channel->display();
32     }
33     void disCCTV2() {
34         this->setChannel(cctv2);
35         this->channel->display();
36     }
37 };
38 Channel* TV::cctv1 = new CCTV1();
39 Channel* TV::cctv2 = new CCTV2();
40 int main() {
41     TV tv;
42     tv.disCCTV1();
43     tv.disCCTV2();
44 }
22. Strategy(策略)
22.1 定义
定义一组算法,将每个算法都封装起来,并且使它们之间可以互换。其用意是针对一组算法,将每一个算法封装到具有共同接口的独立的类中,从而使得它们可以相互替换,使得算法可以在不影响到客户端的情况下发生变化
22.2 优点
■ 策略模式提供了管理相关的算法族的办法。策略类的等级结构定义了一个算法或行为族,恰当地使用继承可以把公共的代码移到父类中,从而避免代码重复。
■ 策略模式提供了可以替换继承关系的办法。继承可以处理多种算法或行为,如果不用策略模式,那么使用算法或行为的环境类就可能会有一些子类,每一个子类提供一个不同的算法或行为。但是,这样算法或行为的使用者就和算法本身混在一起,从而不可能再独立演化。
■ 使用策略模式可以避免使用多重条件转移语句。多重转移语句不易维护,它把采取哪一种算法或采取哪一种行为的逻辑与算法或行为的逻辑混合在一起,统统列在一个多重转移语句里面,这比使用继承的办法还要原始和落后。
22.3. 策略模式的缺点策略模式的缺点如下。
■ 客户端必须知道所有的策略类,并自行决定使用哪一个策略类。这就意味着客户端必须理解这些算法的区别,以便适时选择恰当的算法类,即策略模式只适用于客户端知道所有的算法或行为的情况。
■ 策略模式造成很多的策略类。有时候可以通过把依赖于环境的状态保持到客户端里面,而将策略类设计成可共享的,这样策略类实例可以被不同客户端使用。可以使用享元模式来减少对象的数量
22.4 使用场景
■ 多个类只是在算法或行为上稍有不同的场景。
■ 算法需要自由切换的场景。
■ 需要屏蔽算法规则的场景。
 1 #include<iostream>
 2 using namespace std;
 3 class DisCountStrategy {
 4 protected:
 5     double price = 0;
 6     int number = 0;
 7 public:
 8     DisCountStrategy() {
 9
10     }
11     DisCountStrategy(double price,int number) {
12         this->price = price;
13         this->number = number;
14     }
15     double getPrice() {
16         return price;
17     }
18     int getNumber() {
19         return number;
20     }
21     virtual double calculateDiscount() = 0;
22 };
23 class NoDiscountStrategy:public DisCountStrategy {
24 public:
25     NoDiscountStrategy(double price, int number){
26         this->price = price;
27         this->number = number;
28     }
29     double calculateDisCount() {
30         return 0;
31     }
32 };
33 class  FixDiscountStrategy :public DisCountStrategy {
34 public:
35     FixDiscountStrategy(double price, int number) {
36         this->price = price;
37         this->number = number;
38     }
39     double calculateDisCount() {
40         return getNumber()*1;
41     }
42 };
43 class   PercentageDiscountStrategy :public DisCountStrategy {
44 public:
45     PercentageDiscountStrategy(double price, int number) {
46         this->price = price;
47         this->number = number;
48     }
49     double calculateDisCount() {
50         return getNumber() * getPrice()*0.15;
51     }
52 };